To use System - X Autopost, you'll need a set of API keys from the X Developers website. Follow this guide for a direct path to exactly the keys you need to use this plugin. You'll be autoposting to X in 10 minutes or less - or possibly more. YMMV
Please, Be Security Conscious
You will notice that in this walk-through, that I have published images which contain API keys, tokens, and secrets. By the time this article was published, all of the keys contained in these images had been revoked - they are all useless to anyone, even me. These keys you receive in this process will grant YOU access to tweet on behalf of YOUR OWN X account.
If these keys get into the hands of someone who wants to do bad things - they'll be doing those bad things in your name.
Keep your keys safe, keep them secret. This is very important.
Begin by Logging into X
Let's get started by logging into X with your website account. Once you're logged into X, you'll automatically log in when you get to the developers website.
This can be your personal account if that's how you want to post - just know that the account that sets up the API keys is the account that will need to be upgraded if you need higher limits. The Free level grants you 500 posts per month to one site.
Setup Your Developer Account
Developers Website
Go to https://developers.x.com
Open the Developer Portal
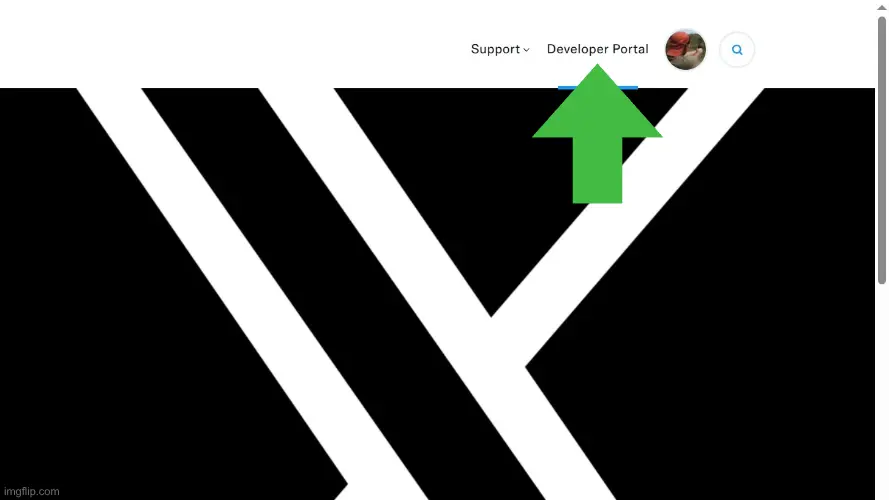
Navigate To Projects & Apps Overview
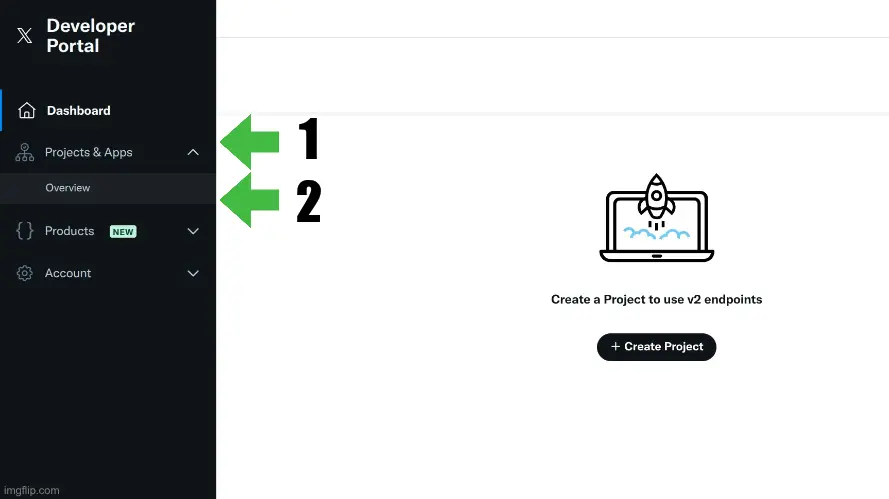
Add a Project
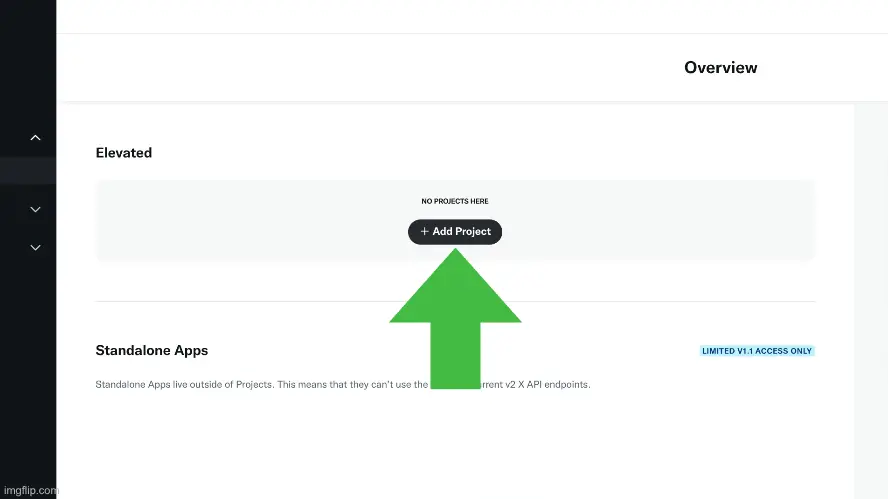
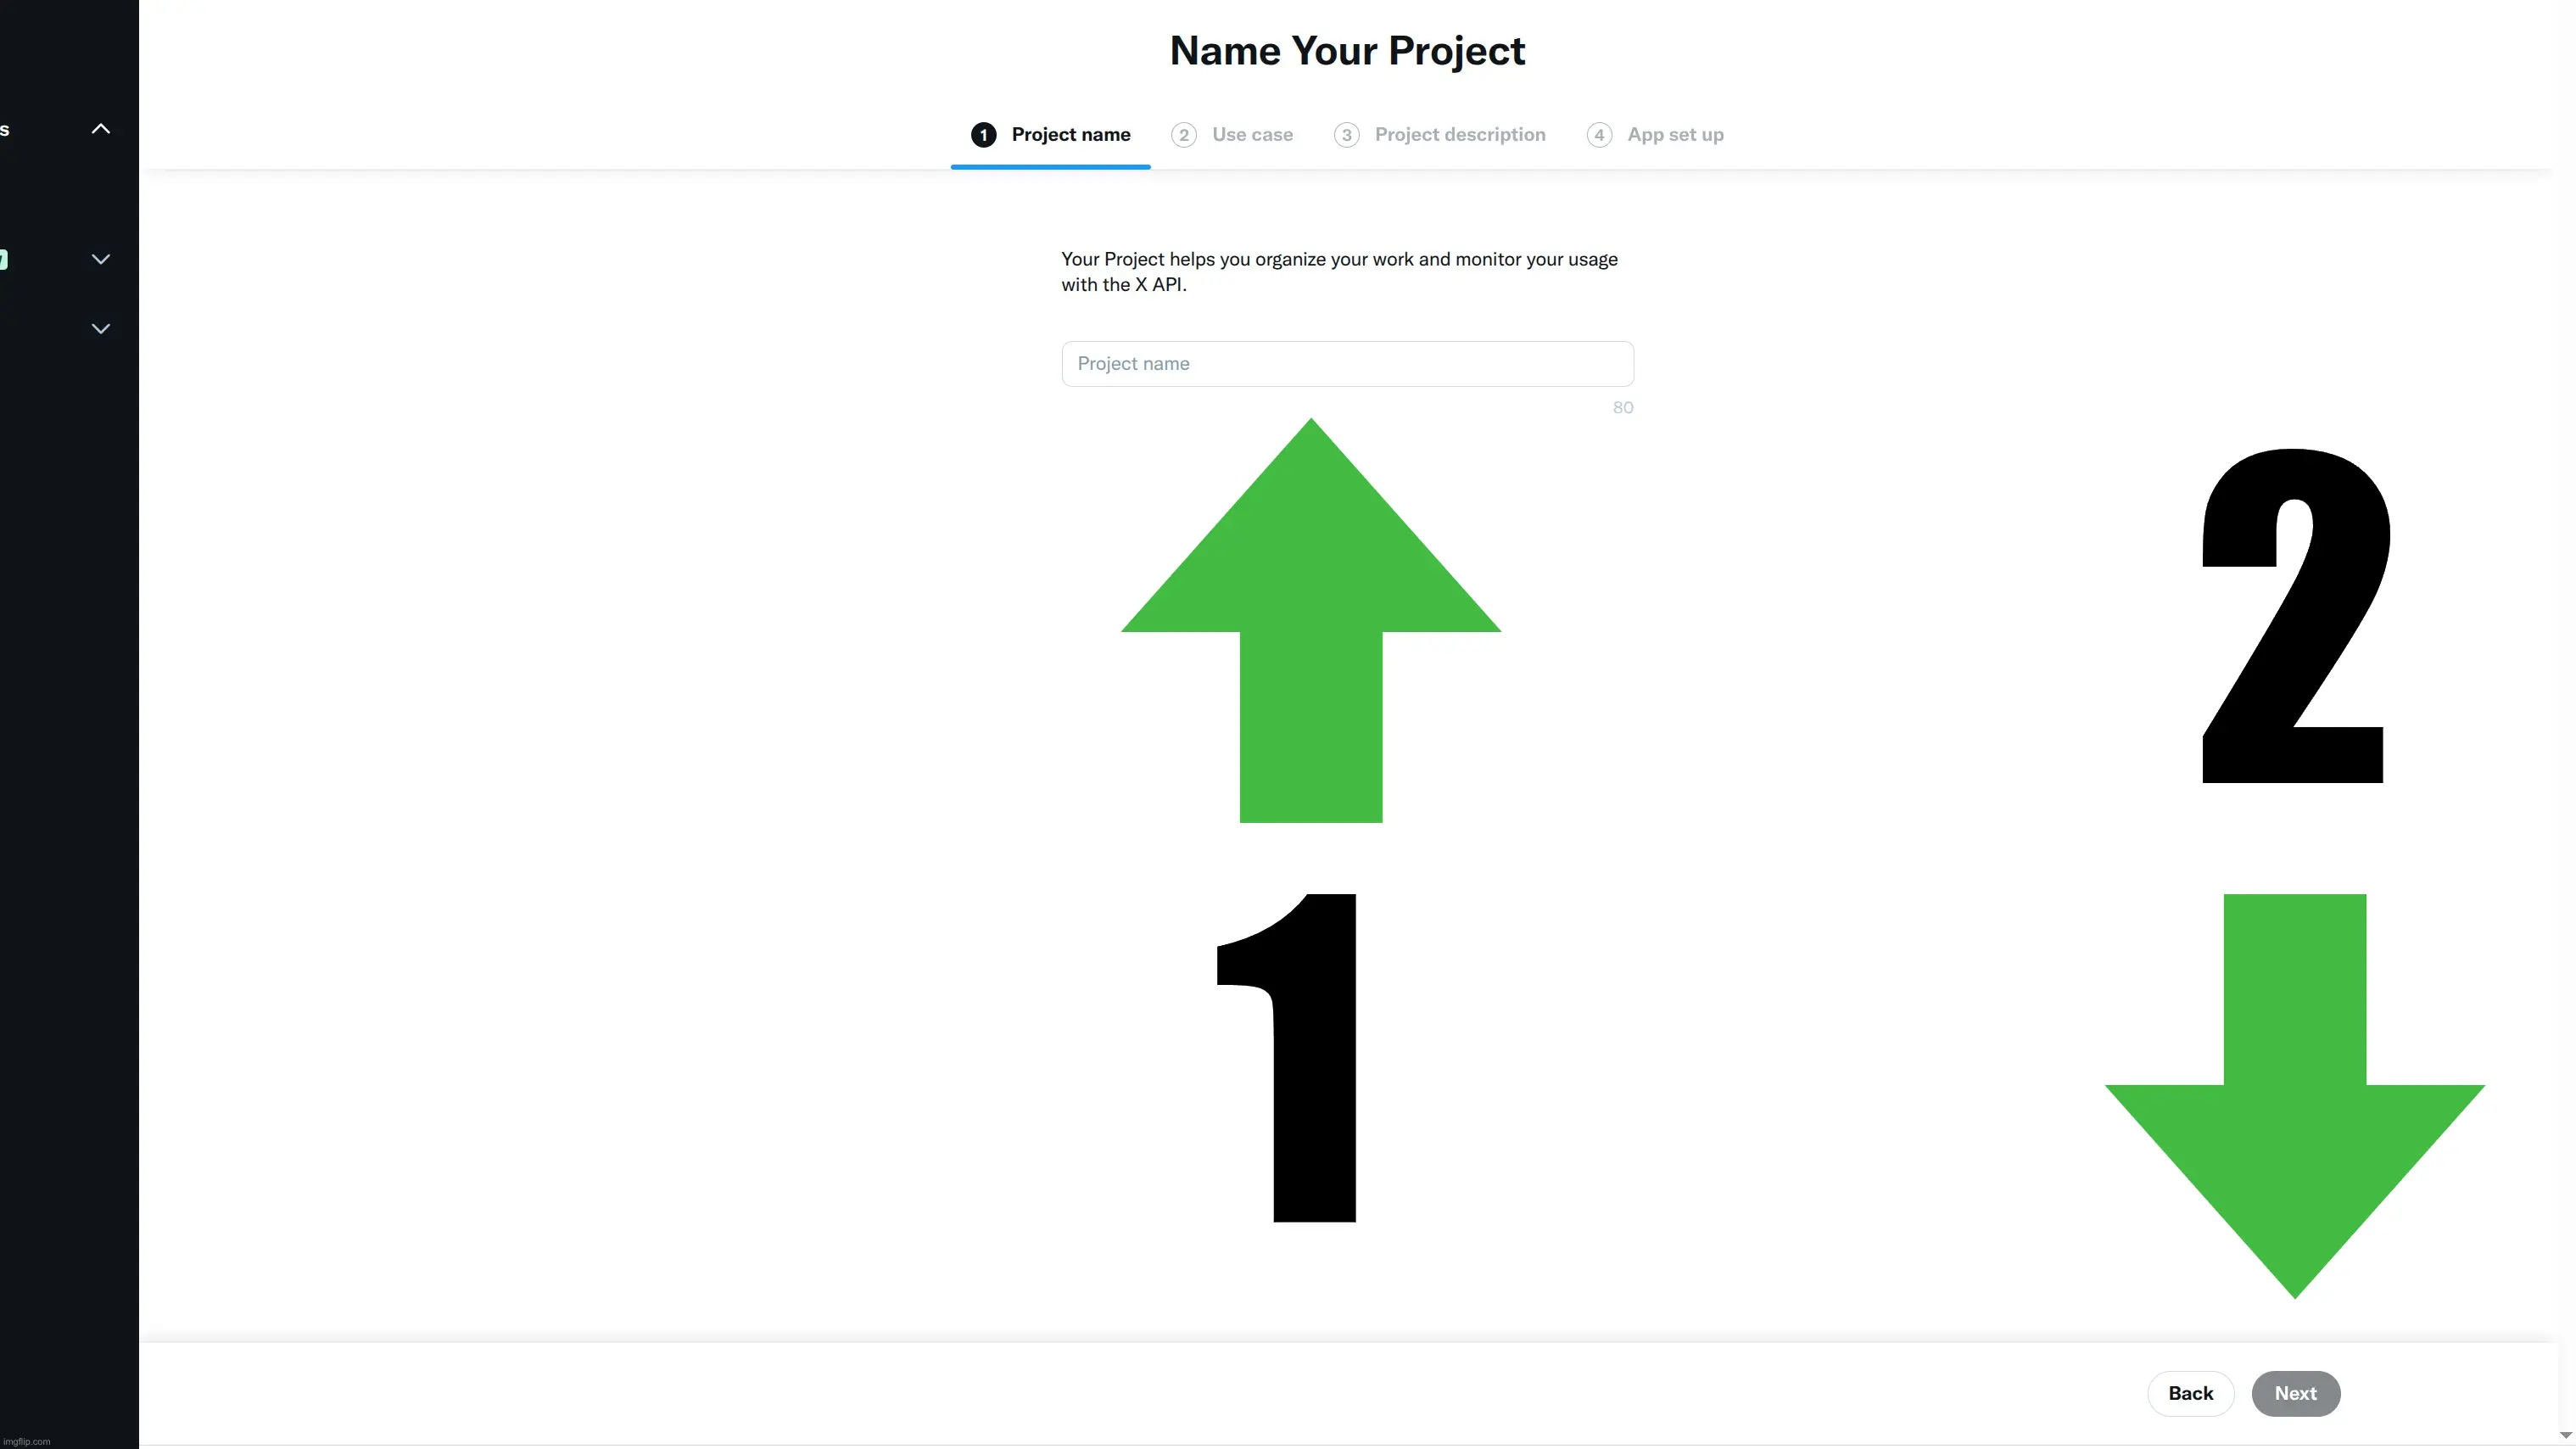
Name the Project
The specific name isn't important, but it should probably reflect what you're doing with it - in this case, setting up the API for X Autopost - so why not:
- Name it X Autopost
- Click Next
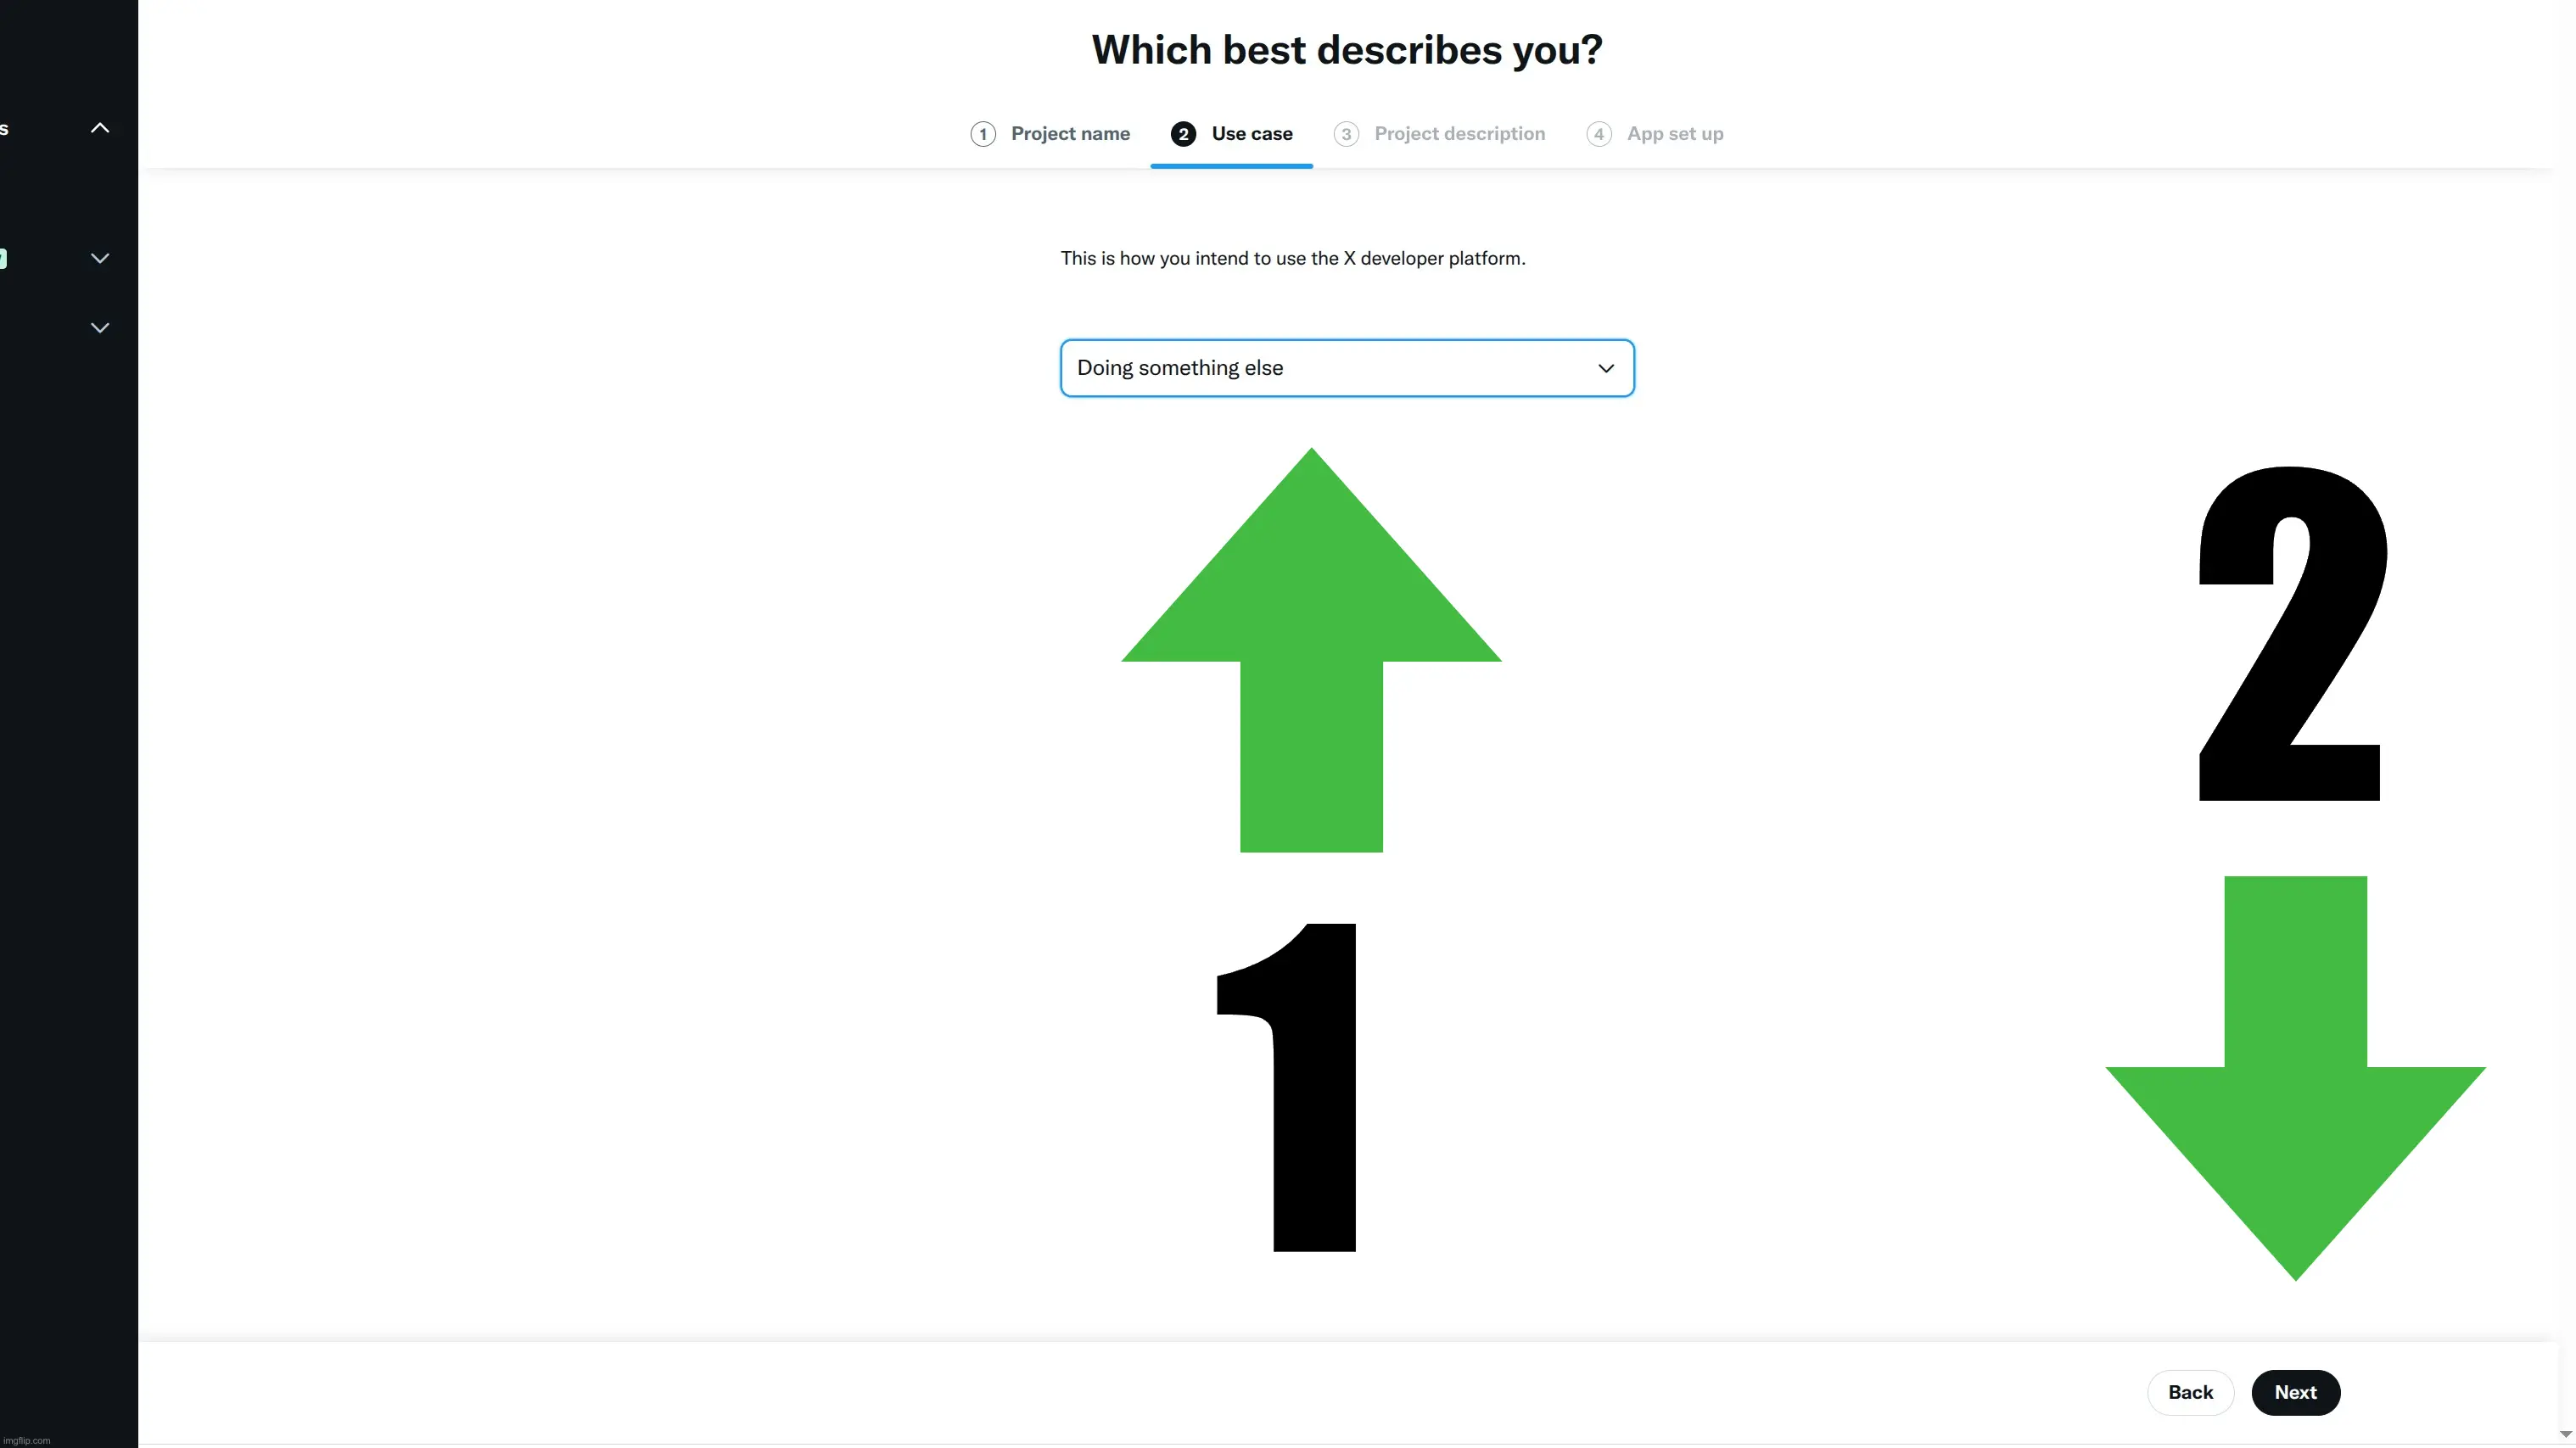
Define Your Use Case
Unsurprisingly, X wants to know how you're using their API. This particular use case isn't listed, so we choose an option that allows us to define it in the next screen.
- Choose "Do something else"
- Click Next
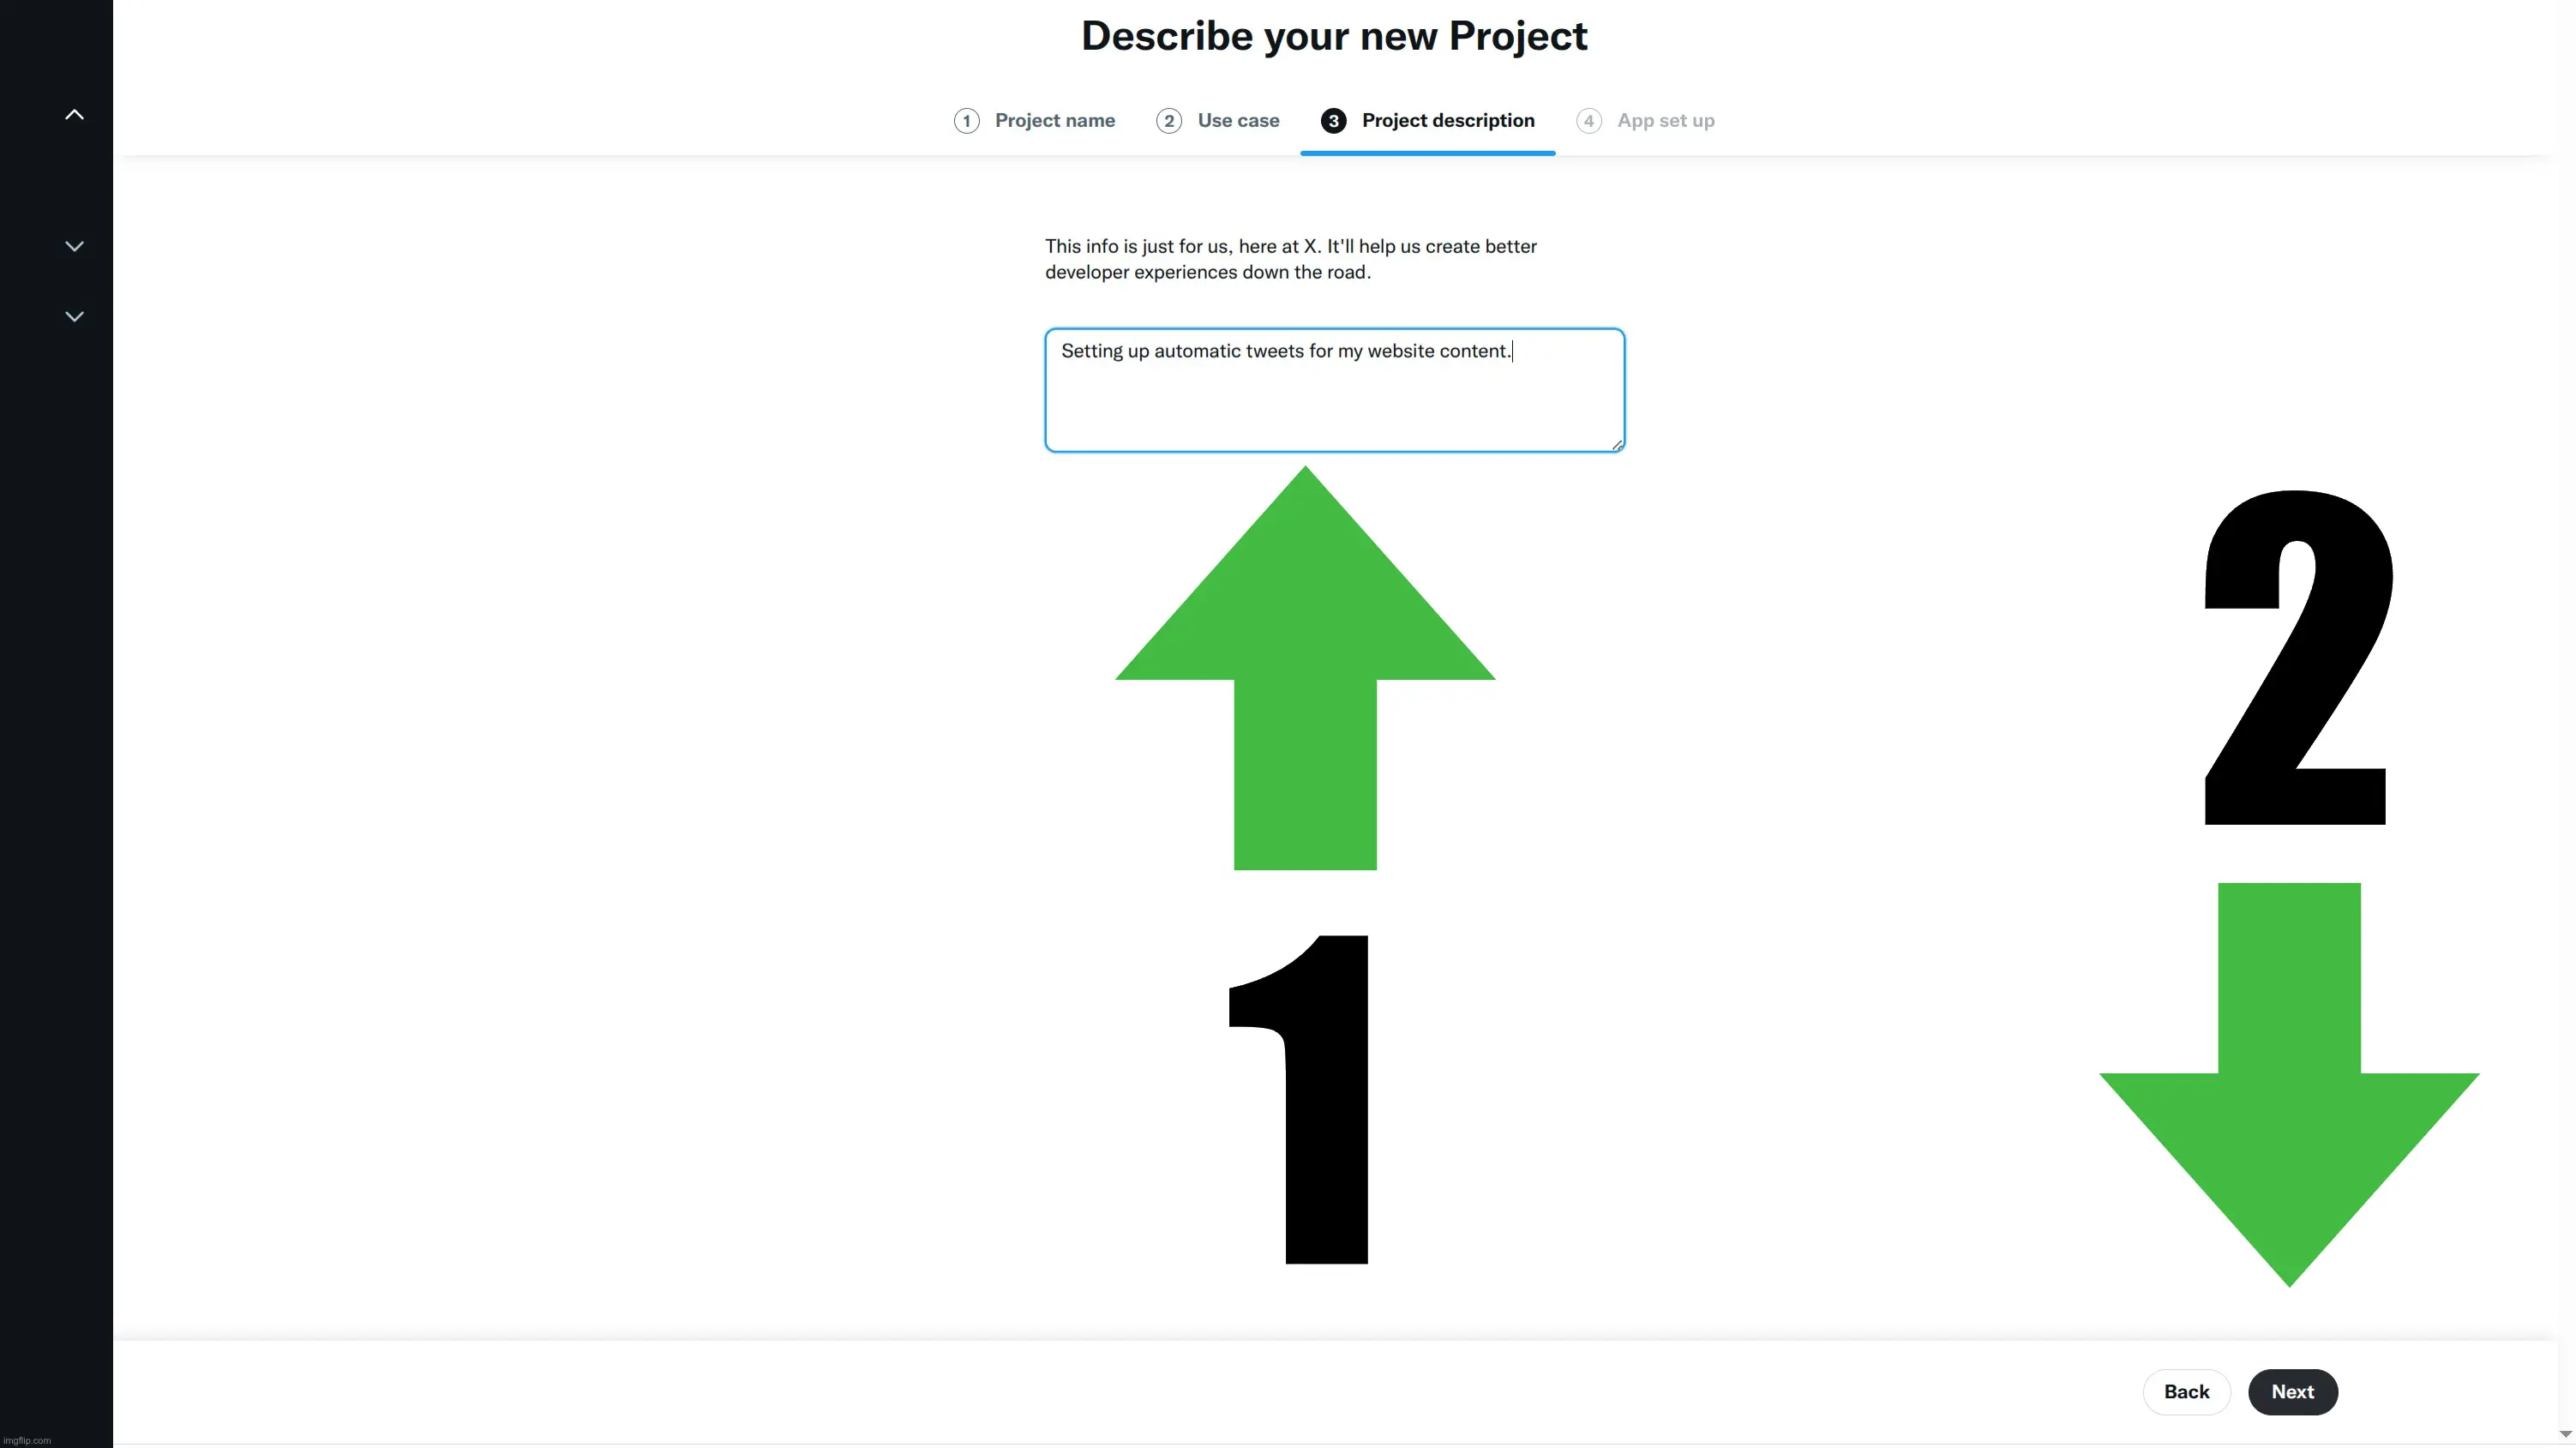
Describe the Project
Here we give X a little more detail about what we're doing. This doesn't have to be elaborate; I suggest something simple like:
"Setting up automatic tweets for my website content."
- Type your description
- Click Next
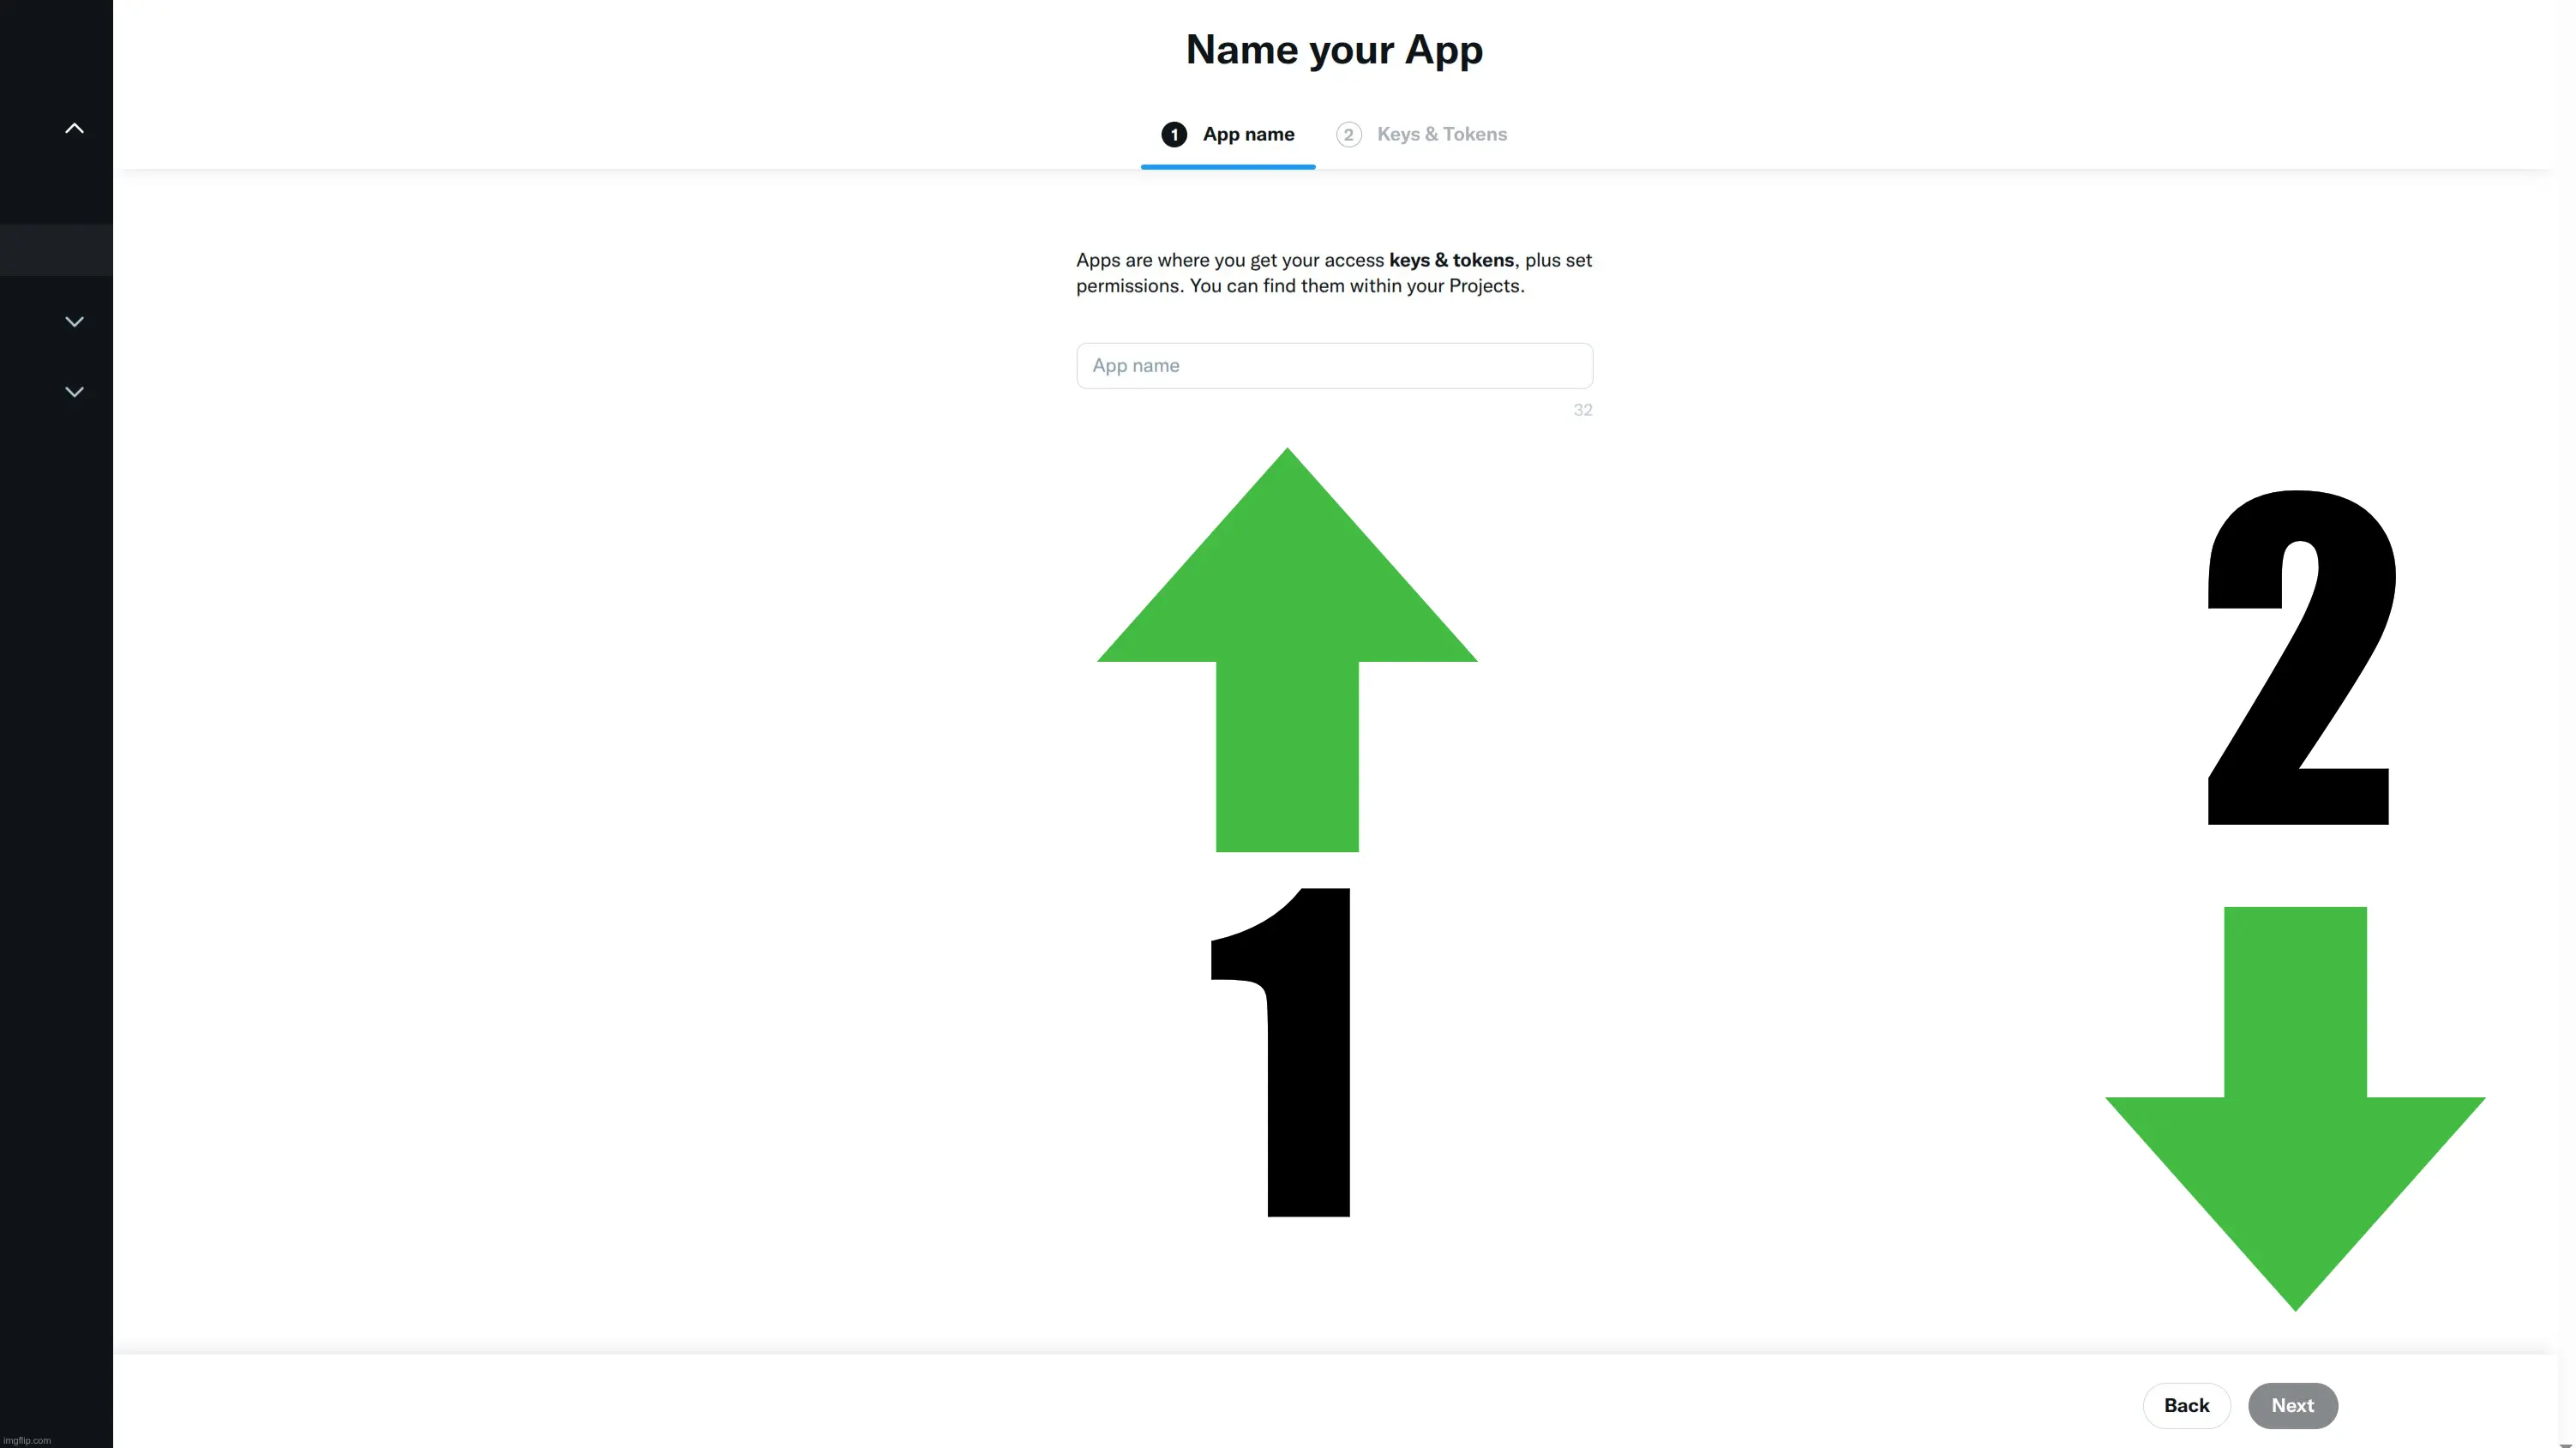
Name Your App
Another item that doesn't need to be elaborate. I like to put the website url here. Just a simple your-site.com will do nicely.
- Type your app name
- Click Next
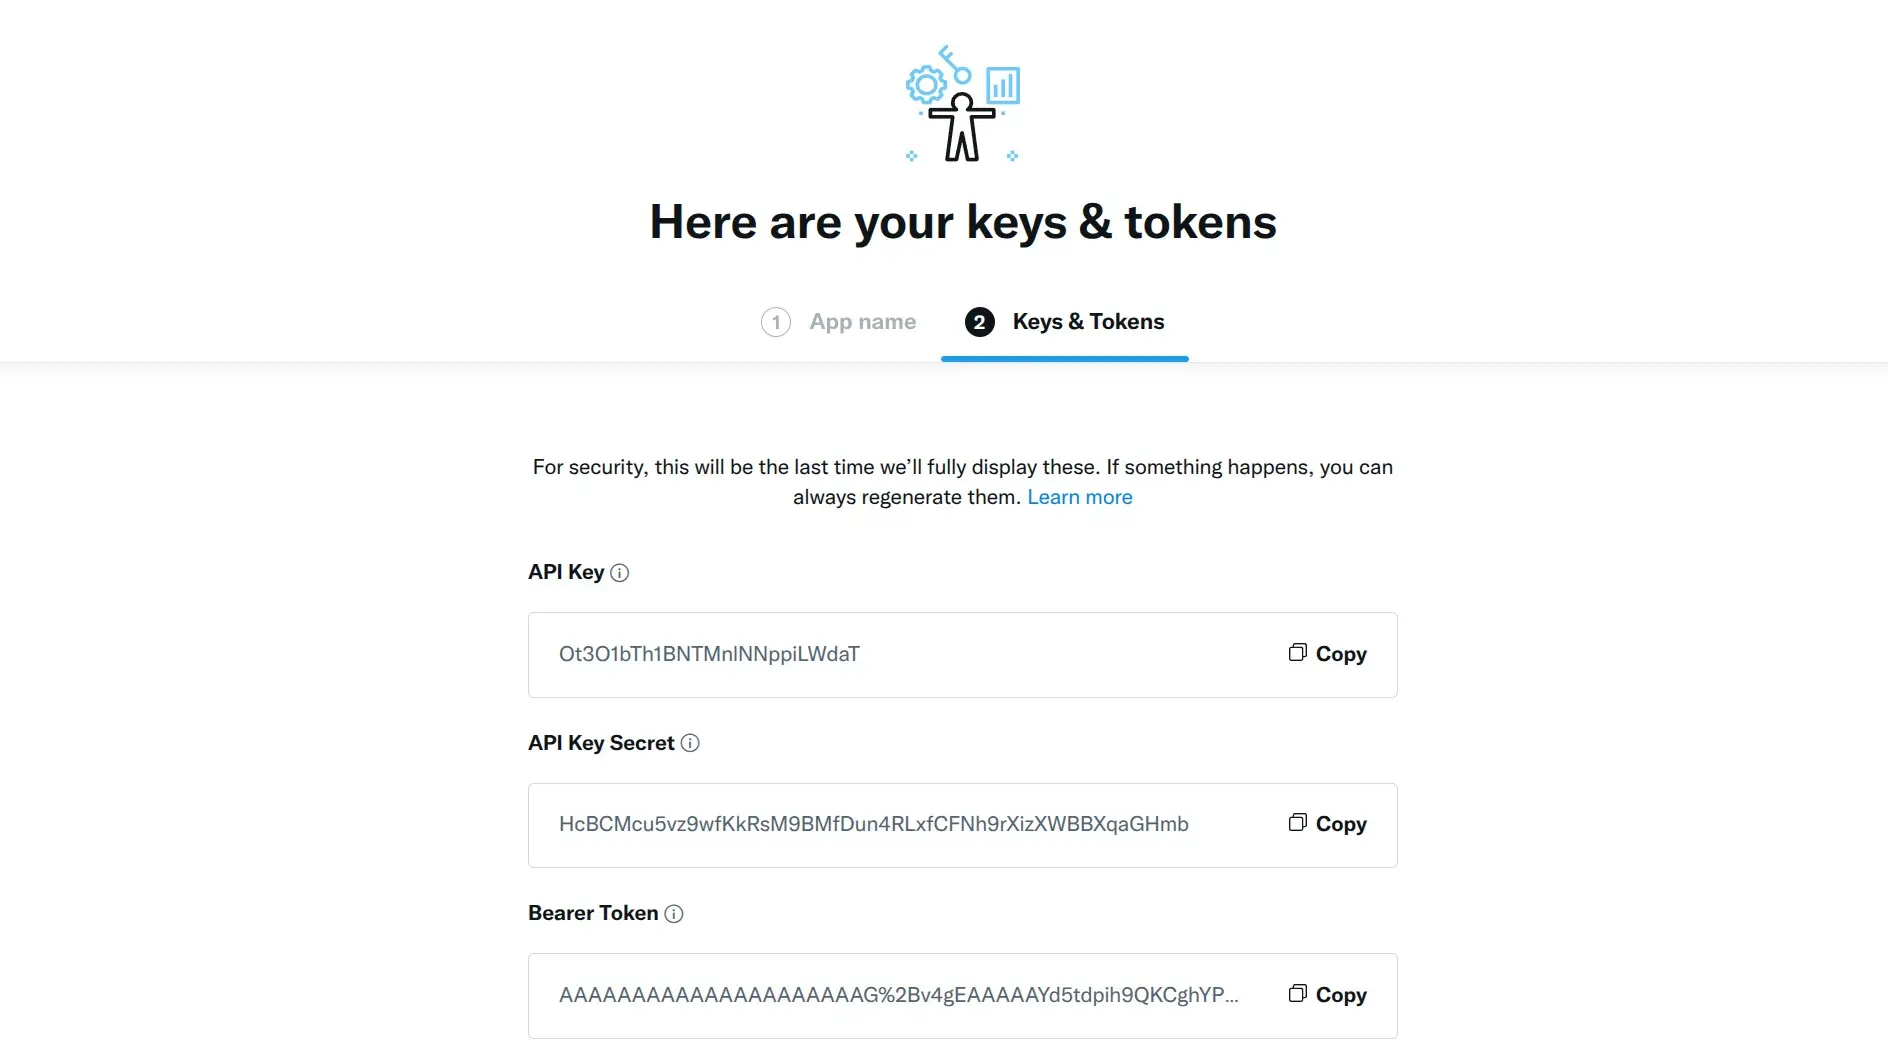
Keys & Tokens!
Believe it or not, you're halfway there. You have half of the information you need for the X Autopost plugin to operate. Before you move on, save your API key, API key secret, and Bearer Token. We don't specifically need the bearer token, but this is your only opportunity to save it.
- Create a file on your computer to store these keys
- Be sure to save the type of key, and copy the exact keys into that file. Don't type them, use copy/paste.
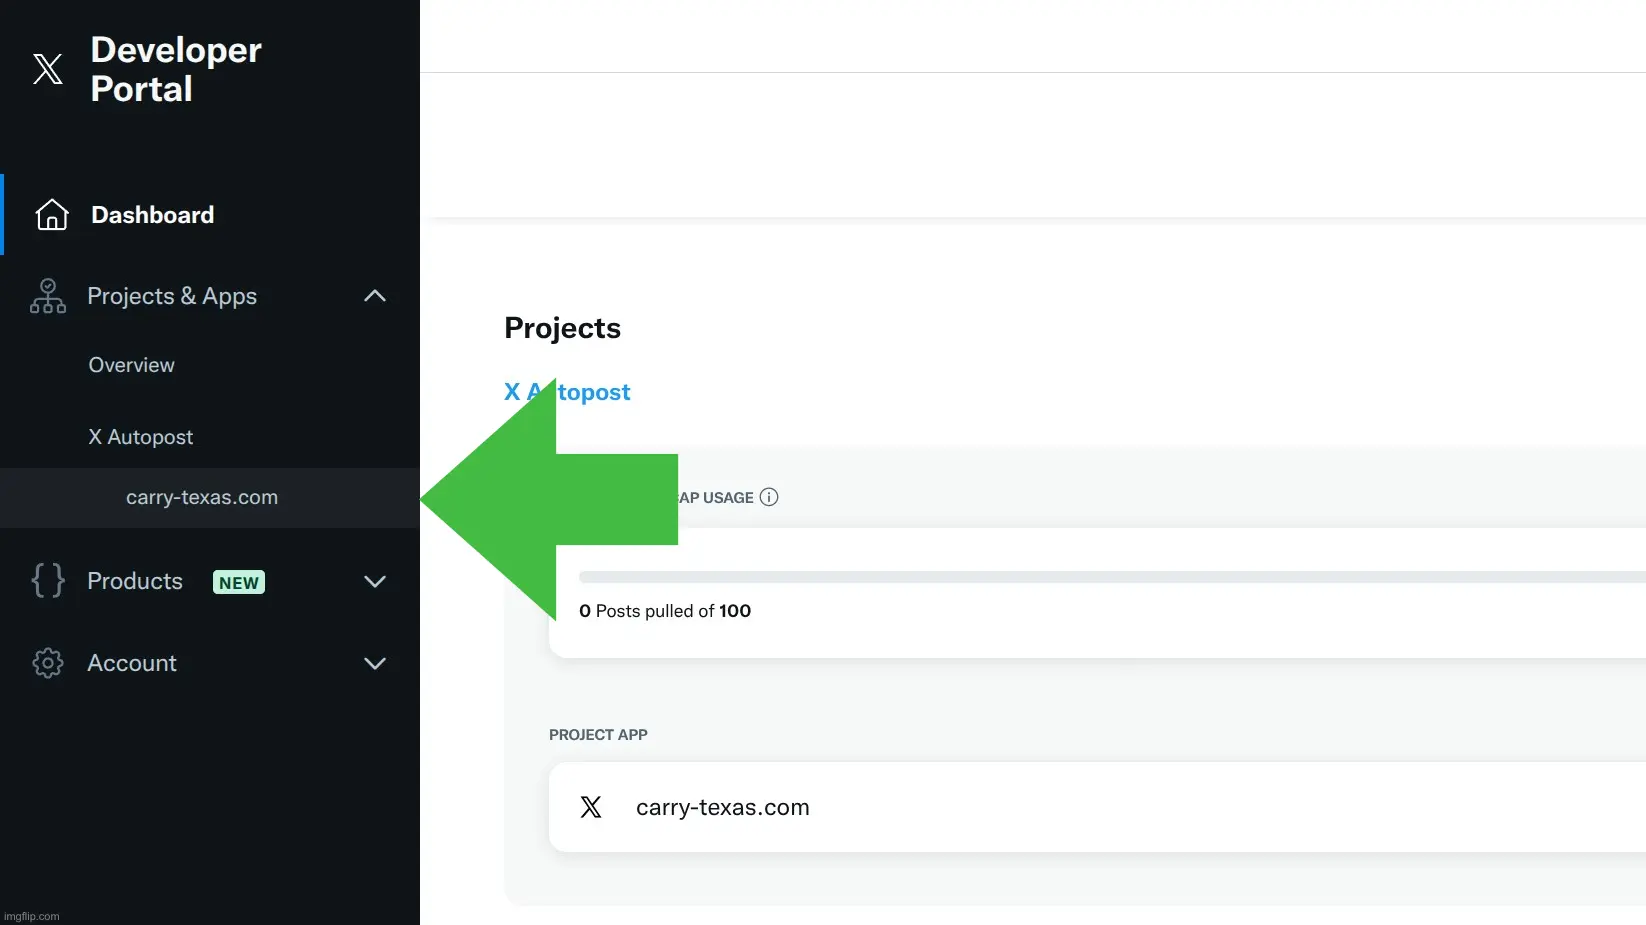
Open Your App
Look in the Projects & Apps menu for your project (X Autopost if you're following this guide closely) and your app (named after your domain, if you're following closely) and click on the app (domain name). In this case, I've named the app for the website I'm setting it up on - carry-texas.com
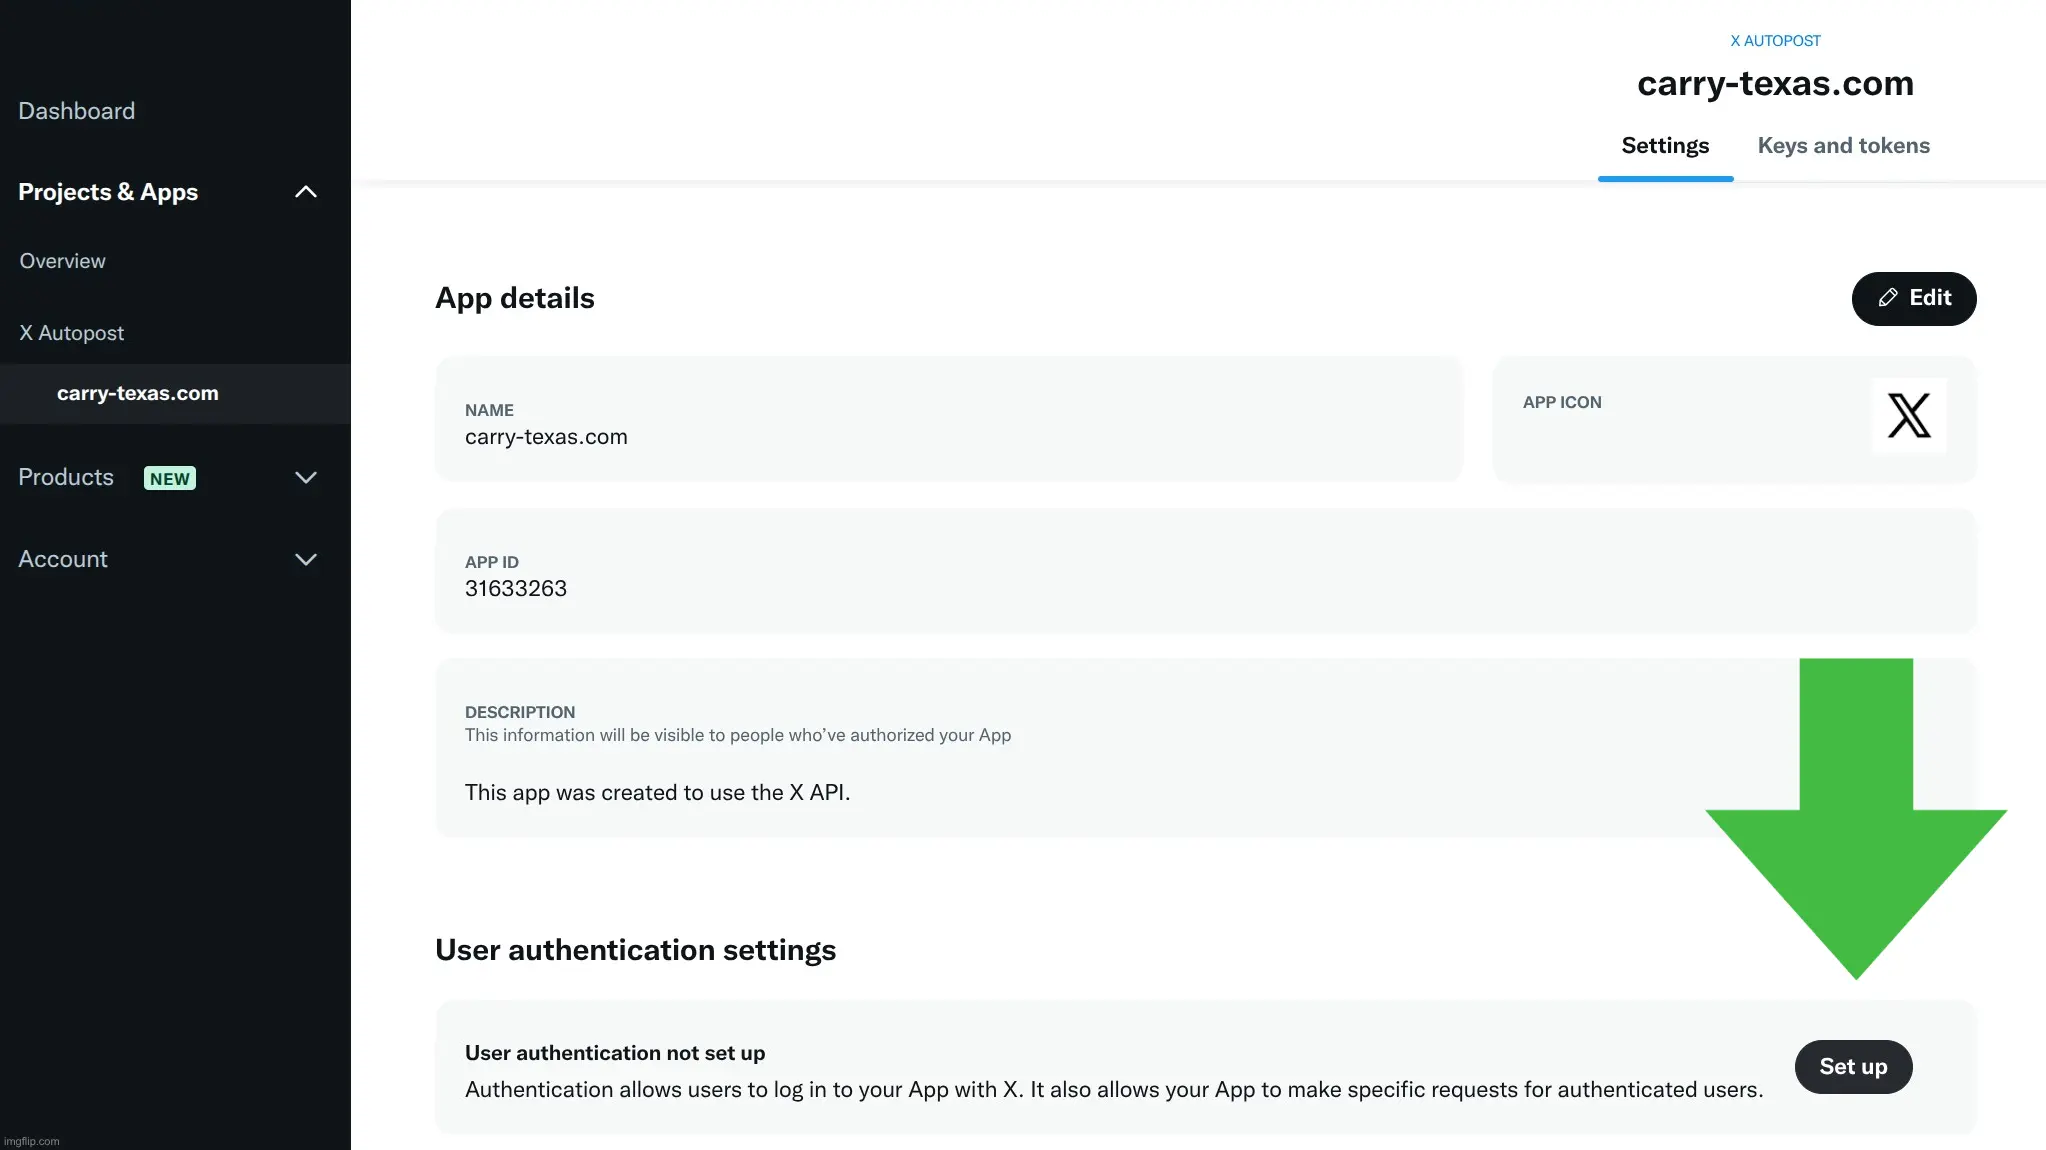
Set Up Authentication
Look for the "Set up" button below "User Authentication Settings" and click it.
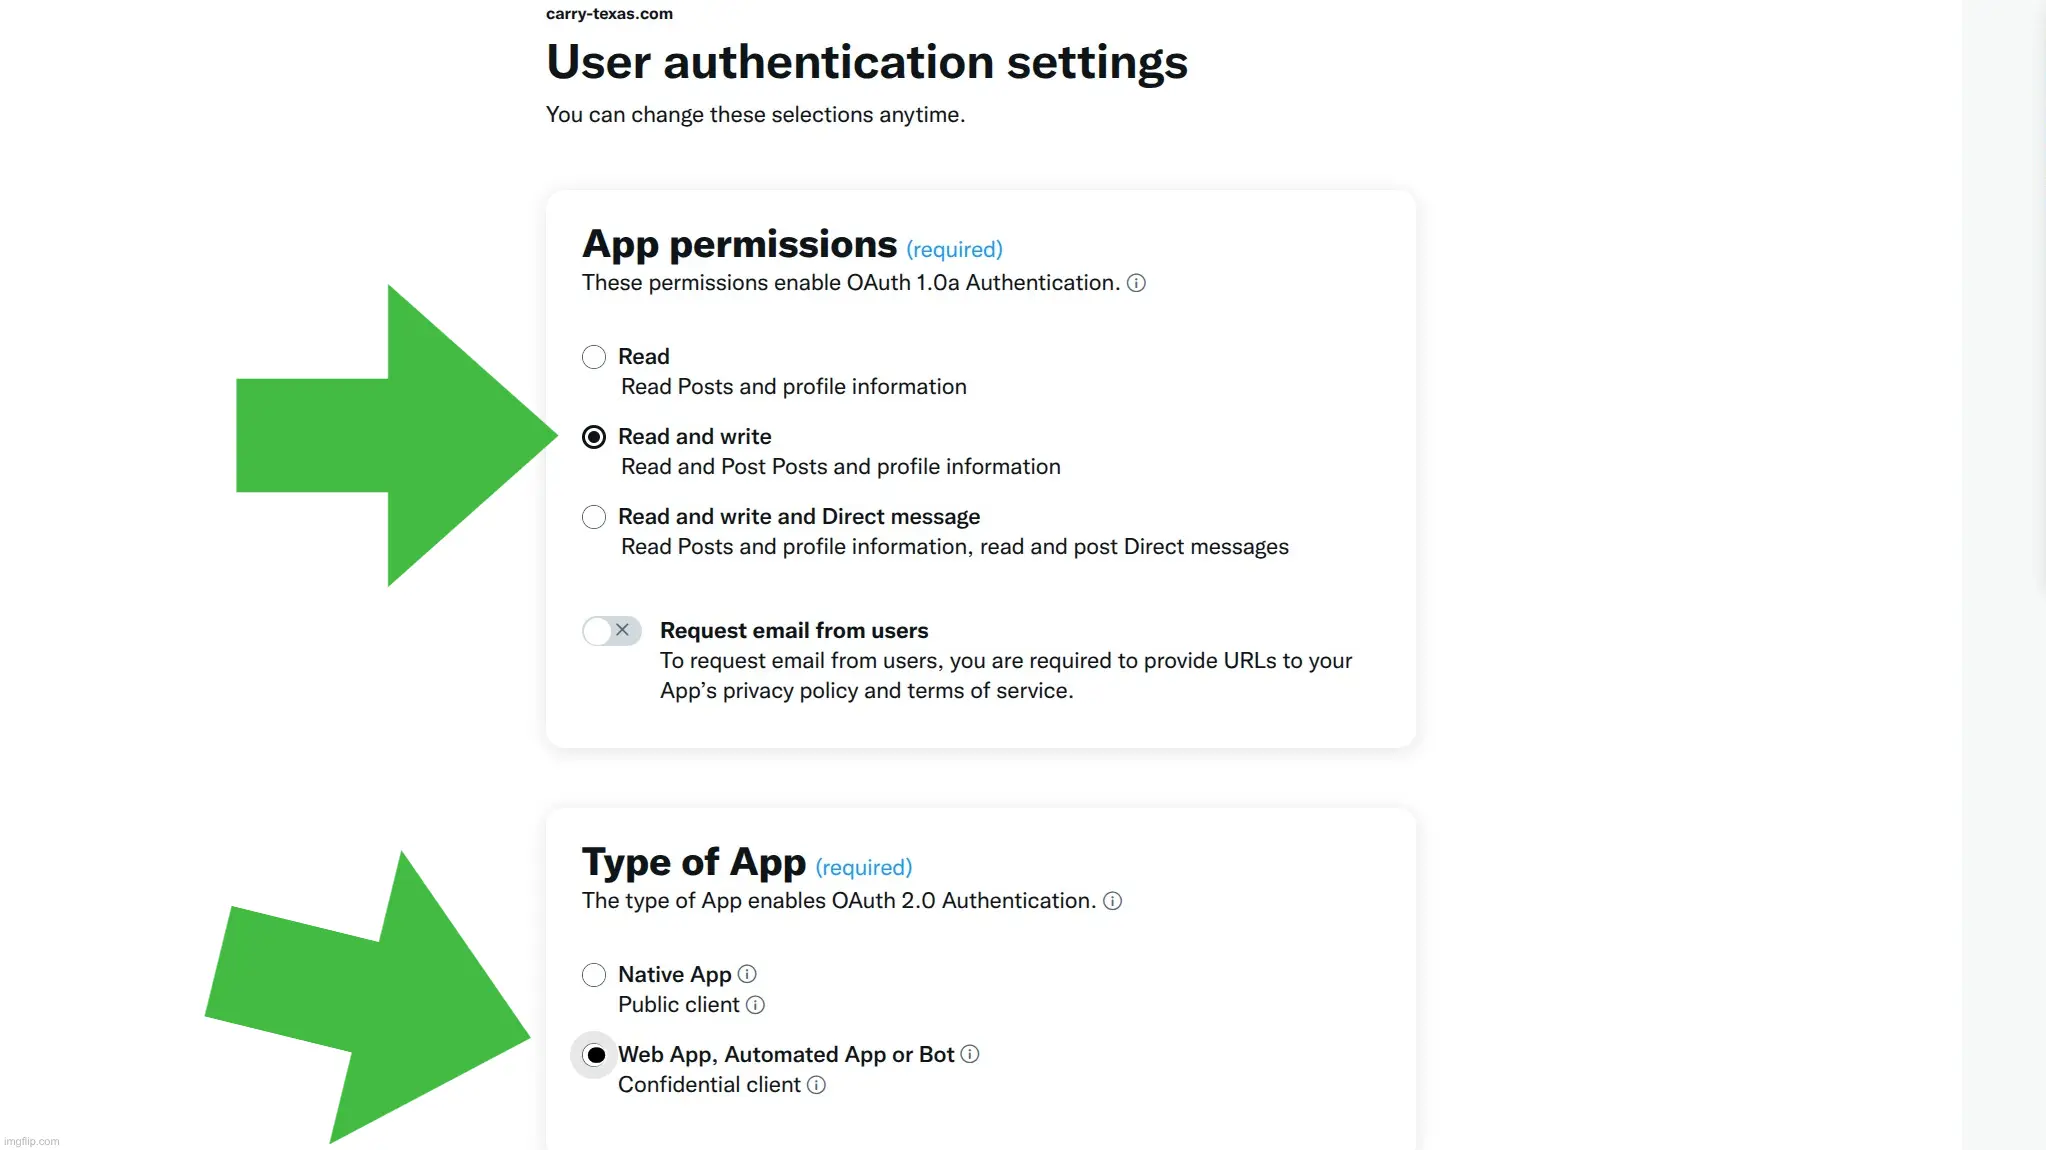
User Authentication Settings Part 1
This is presented as Part 1 and Part 2 because both parts are the same page, I just can't fit everything into 1 image.
- Under "App permissions" choose "Read and write"
- Under "Type of App" choose "Web App, Automated App or Bot"
User Authentication Settings Part 2
In the App Info section only 2 fields are required, and we will be fibbing a little in one of them. This is fine, because the process we use isn't going to trigger the URL they're asking for. So let's go!
- In the "Callback URL / Redirect URL" field, enter:
- https://your-site.com?option=com_ajax&format=raw
- In the Website URL field, enter your website address:
- https://your-site.com
- The rest of the fields are optional, when you've filled out the 2 required fields you can click "Save"

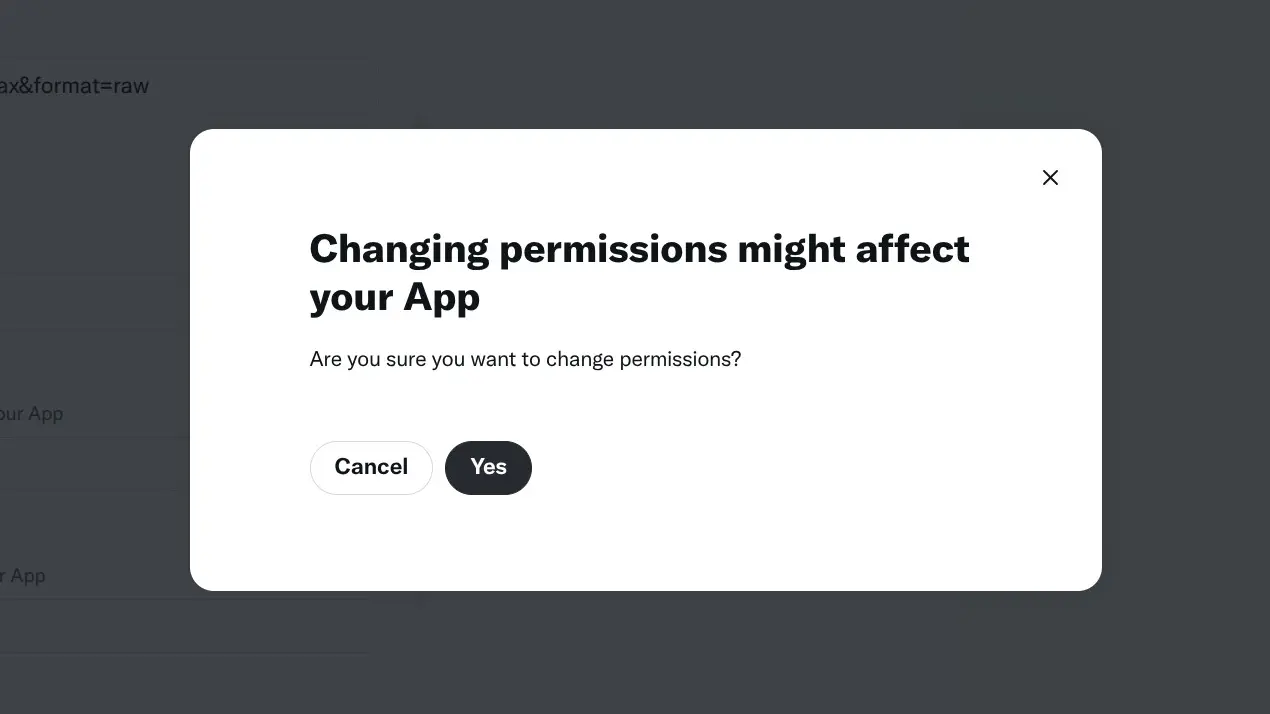
An Ominous Warning
It's fine, you can just click Yes.
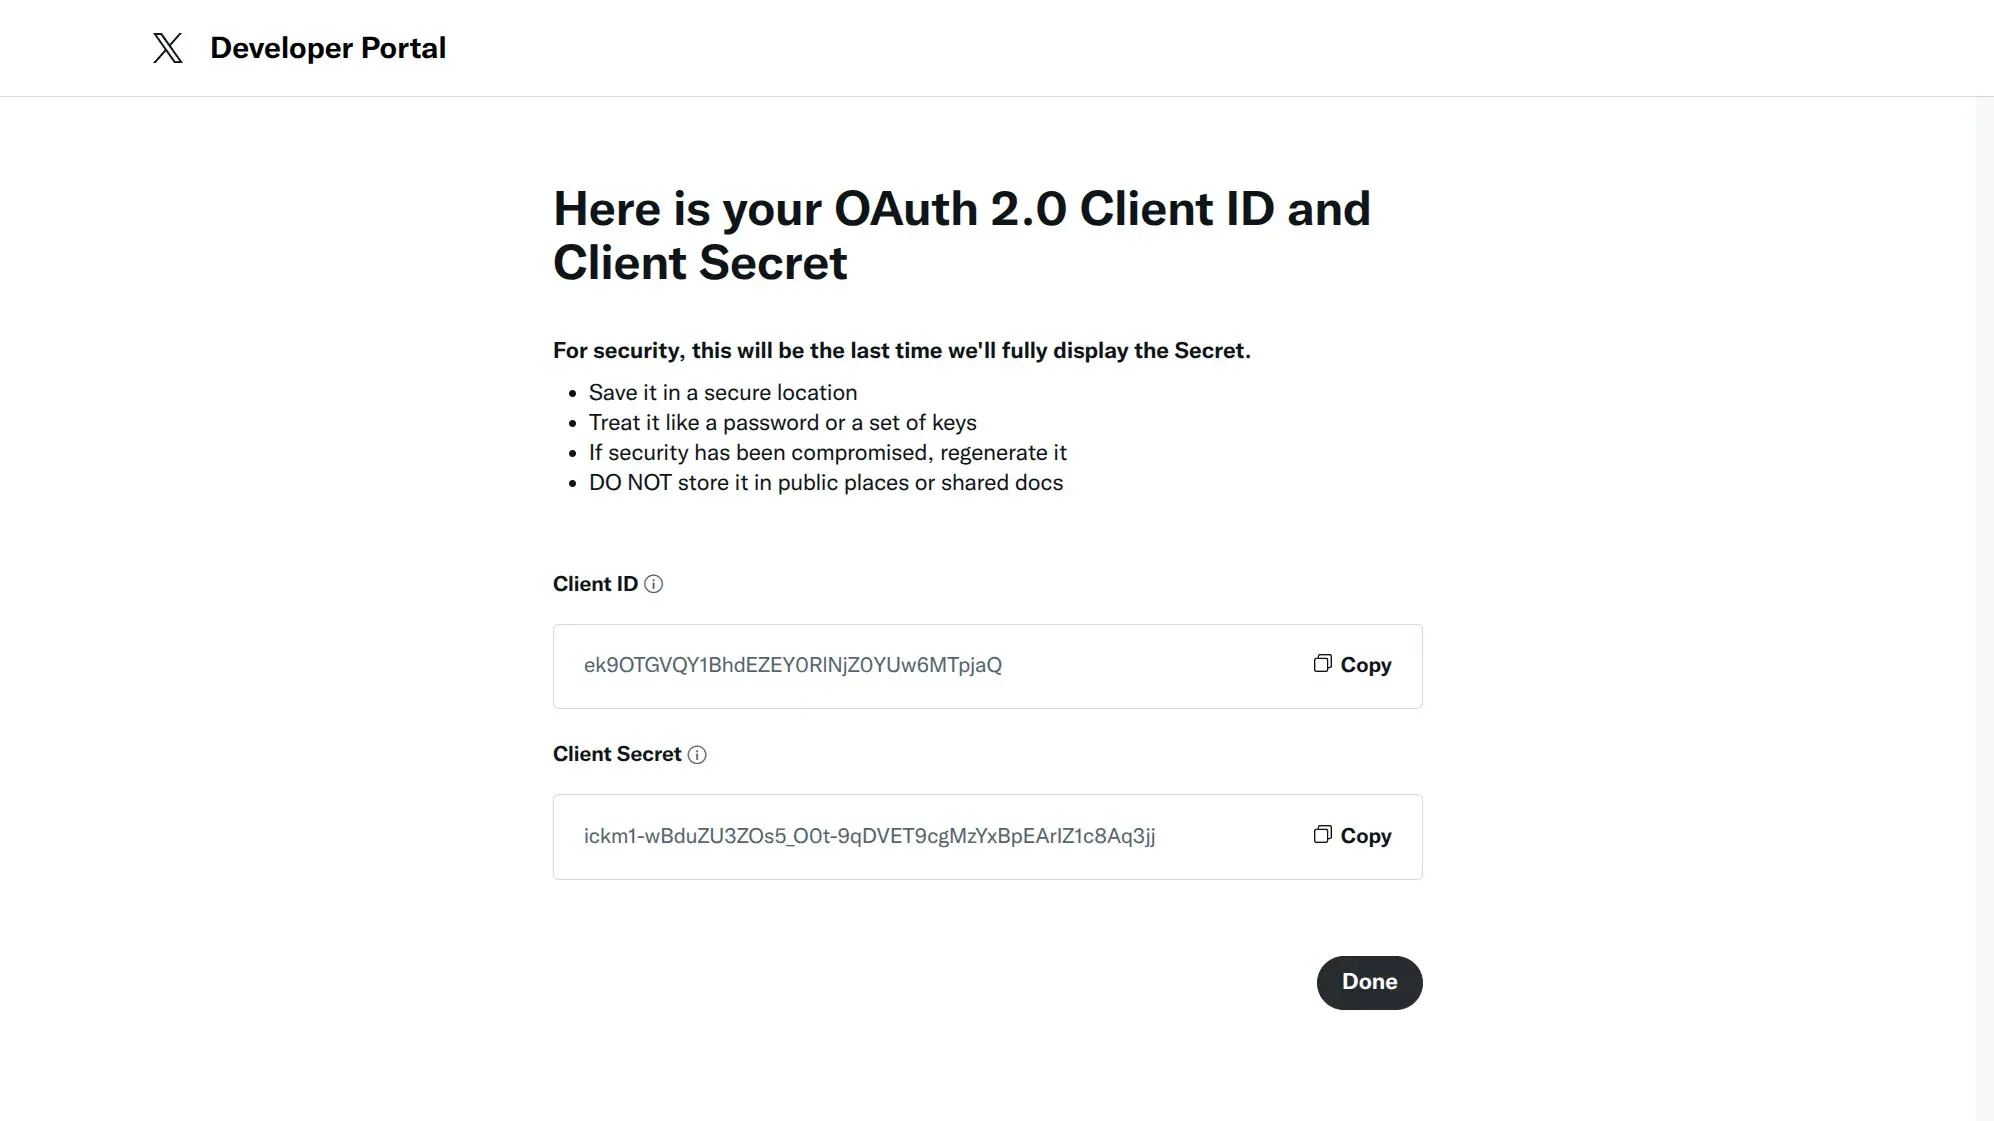
More Secrets!
We don't specifically need the Client ID and Client Secret for X Autopost - but this is the ONLY time you'll have an opportunity to save these, so you should add it them to your document in case you do something else with the X API later.
When you have them copied down, click "Done"
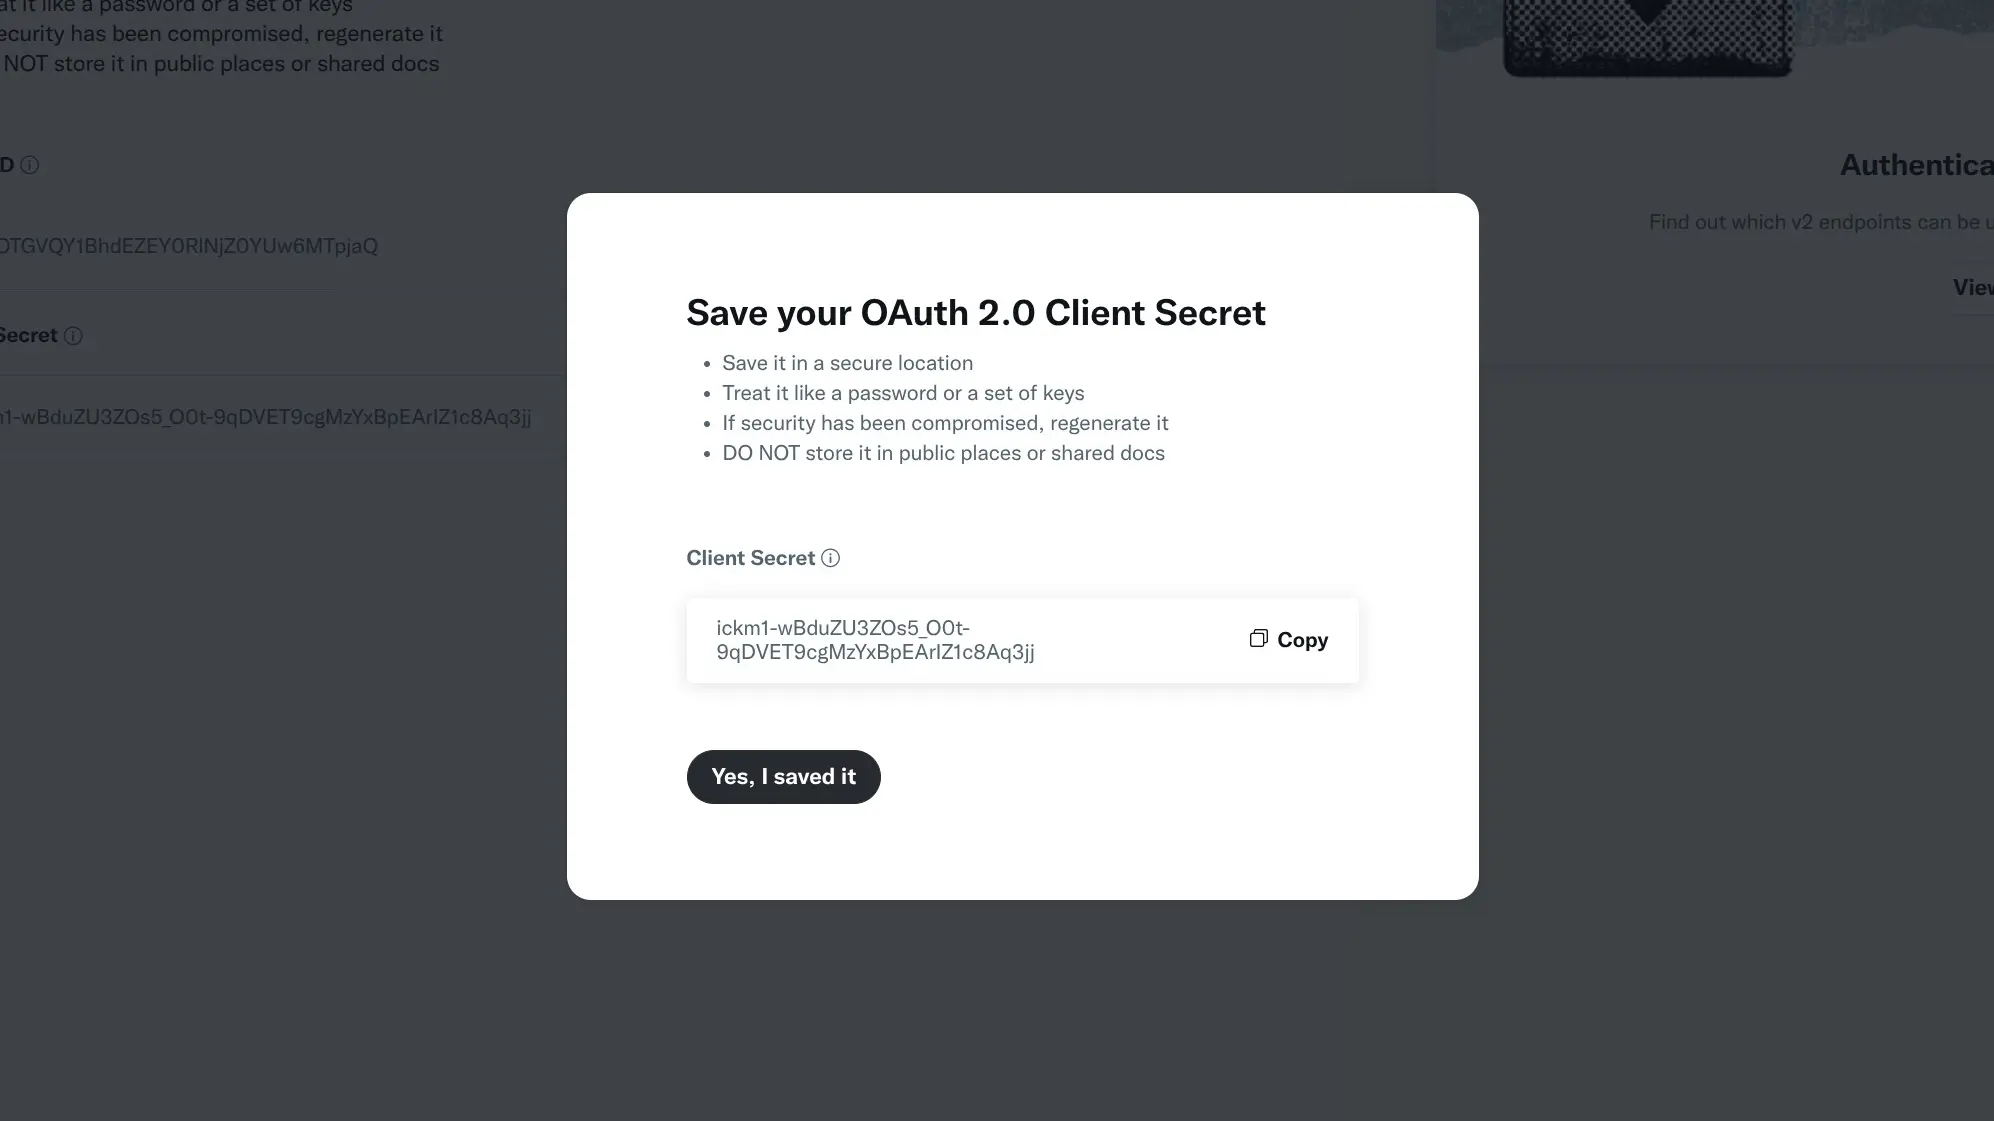
X Just Looking Out For You
You'll be presented with a confirmation window asking if you have saved your secret. Just in case, maybe check that you have it in your document. Then click "Yes, I saved it"
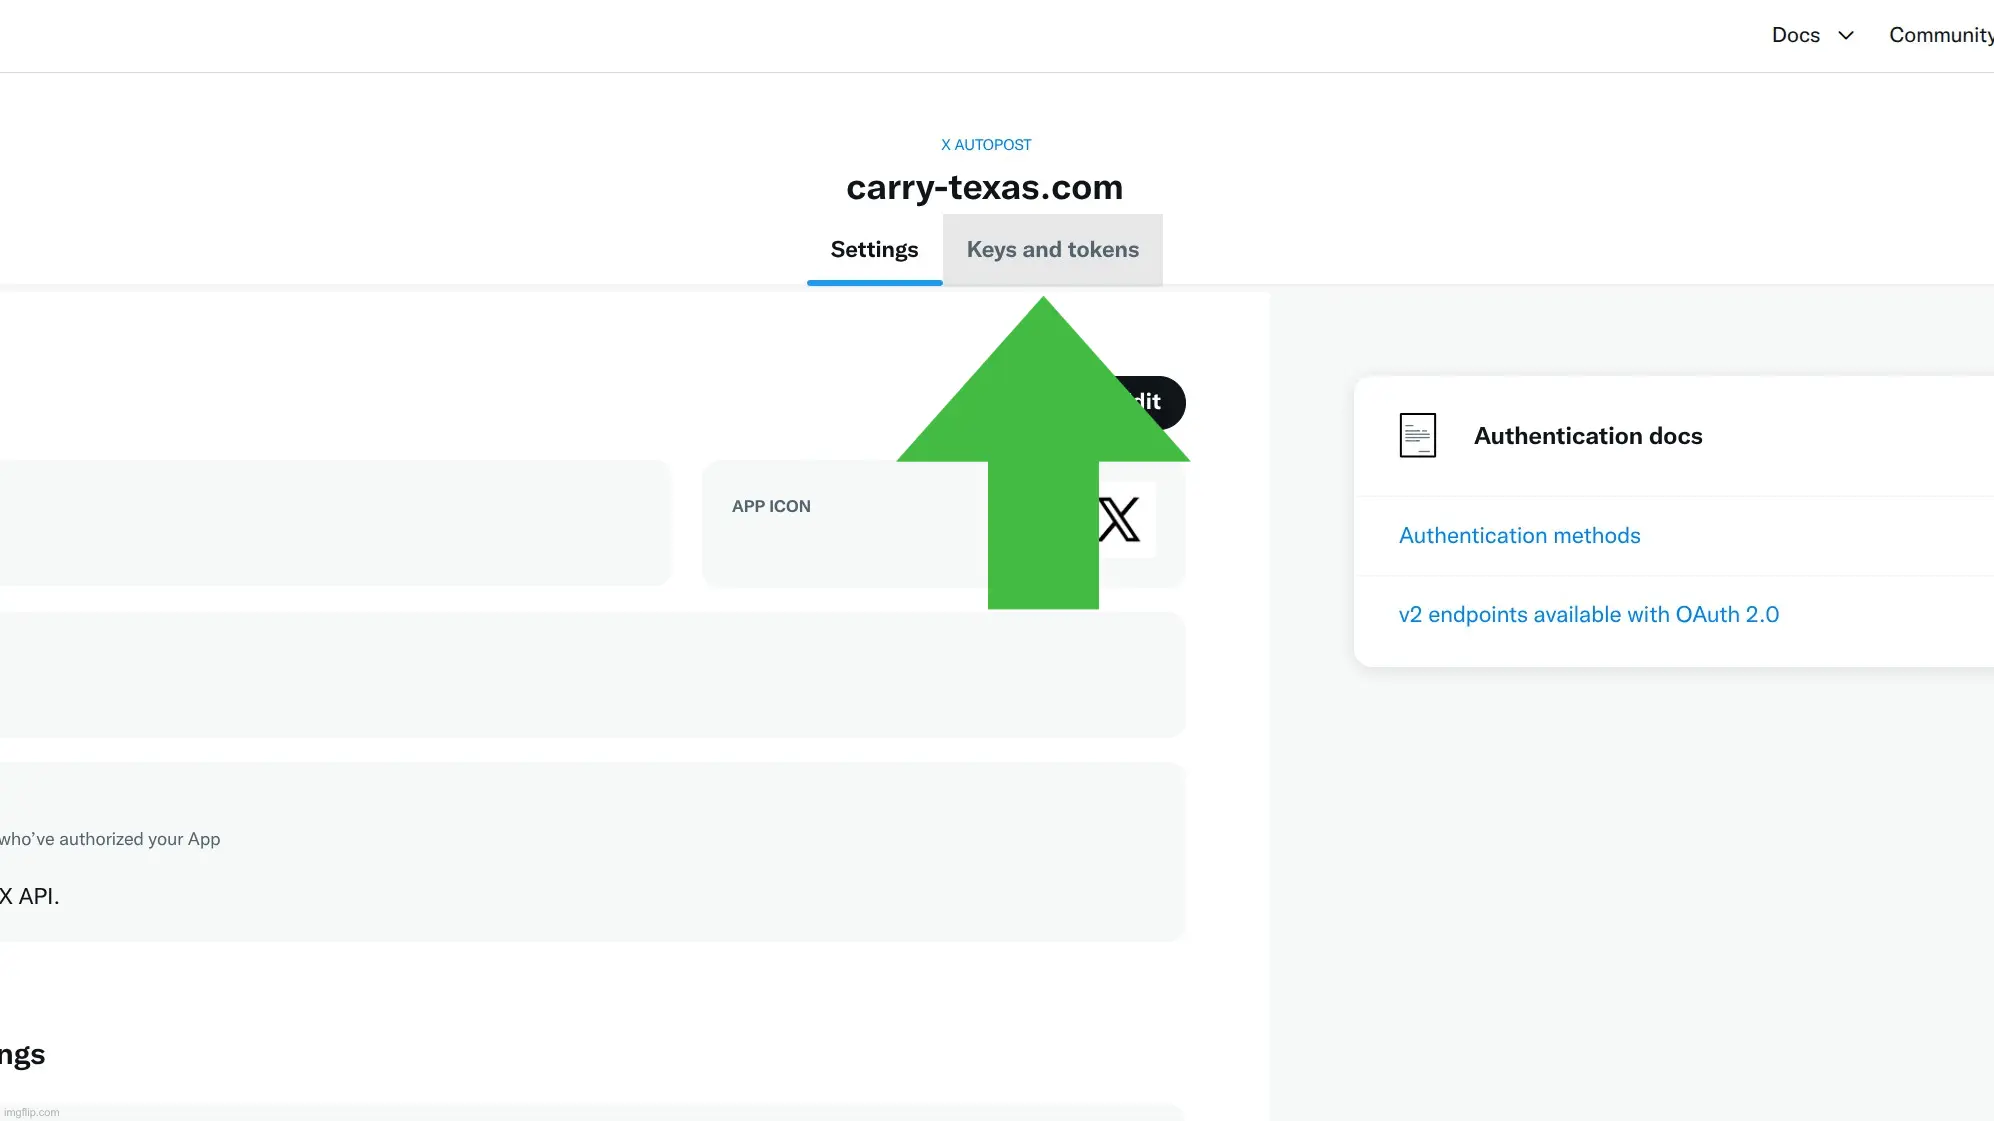
Open Keys and Tokens
Back in the app page (the one named after your domain name), click the "Keys and tokens" tab
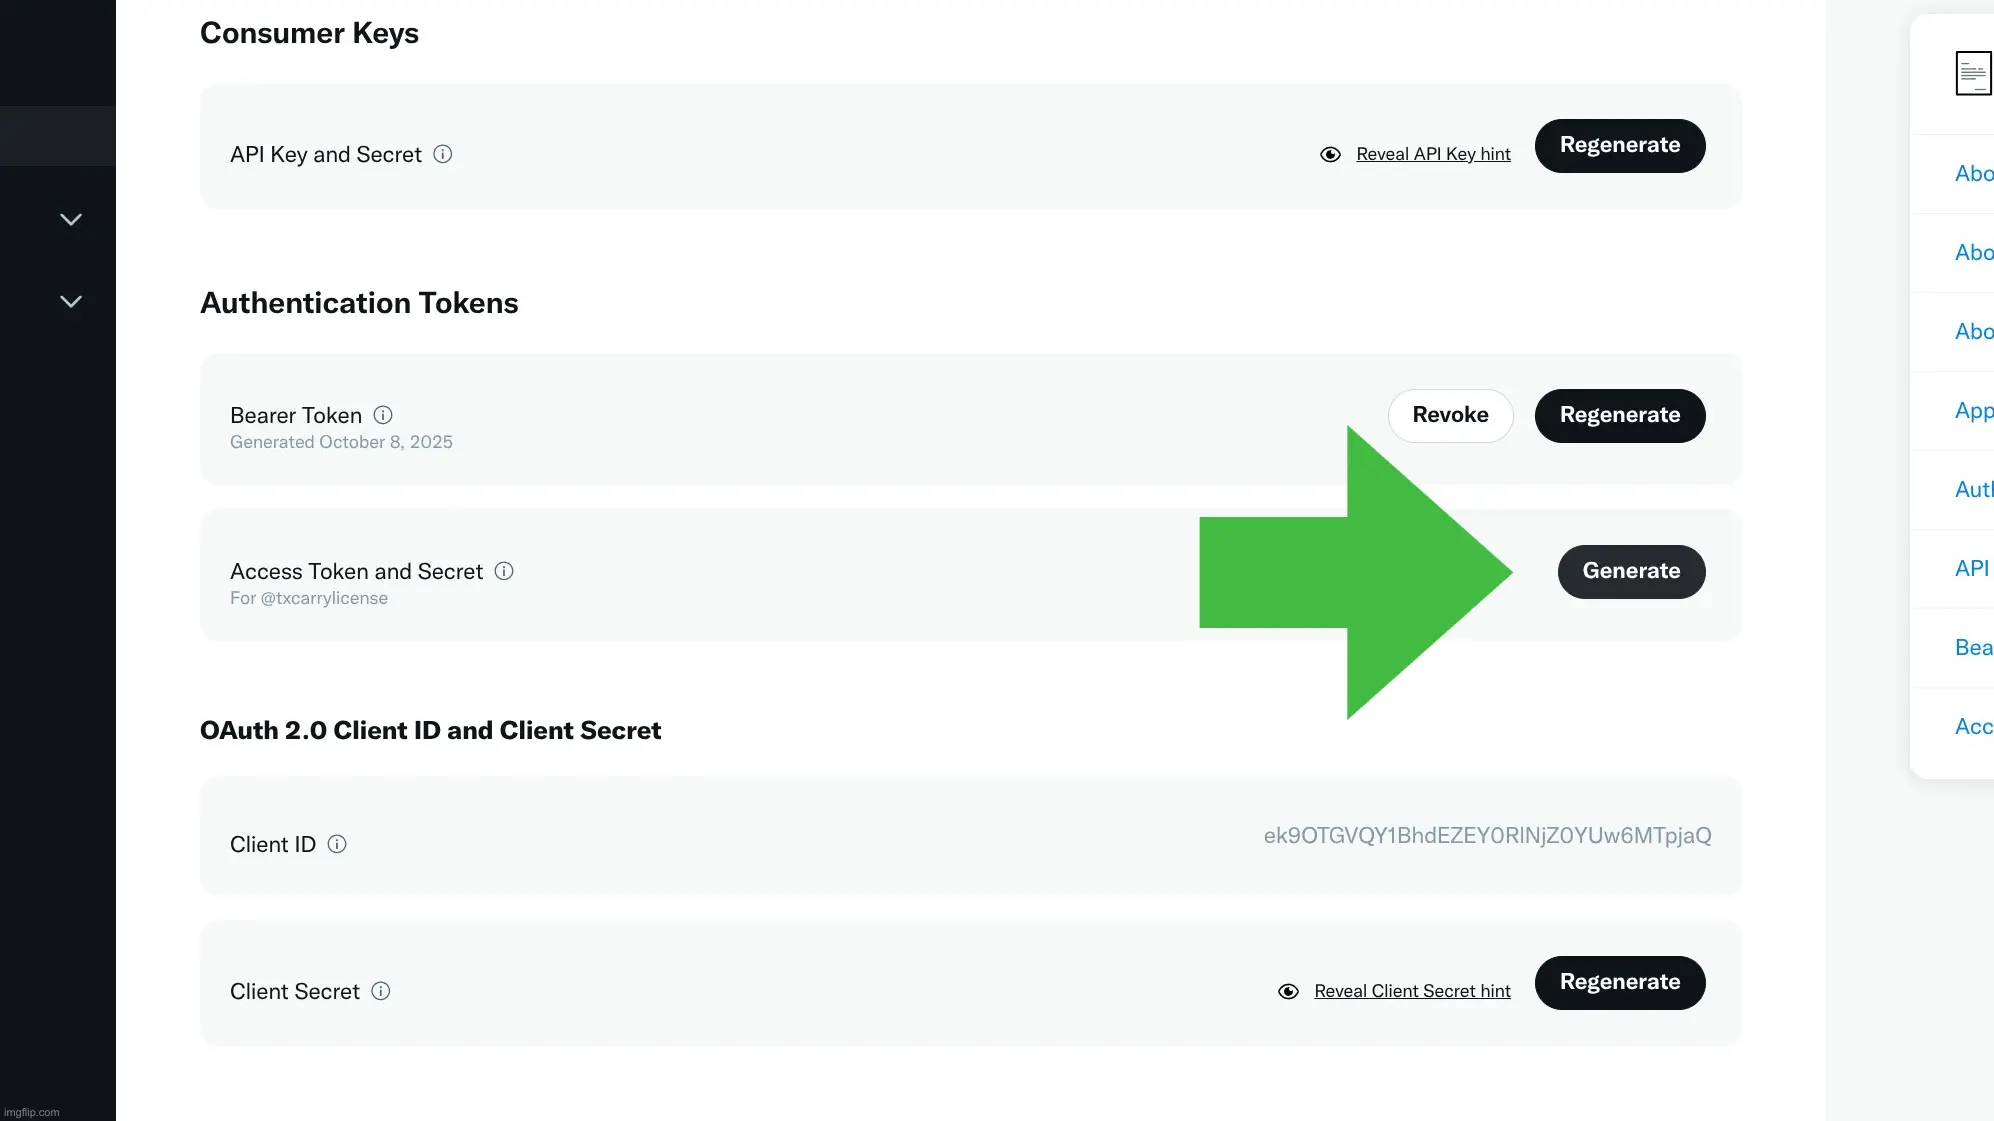
Generate Access Token and Secret
Locate "Access Token and Secret" under the "Authentication Tokens" section, and press the "Generate" button.
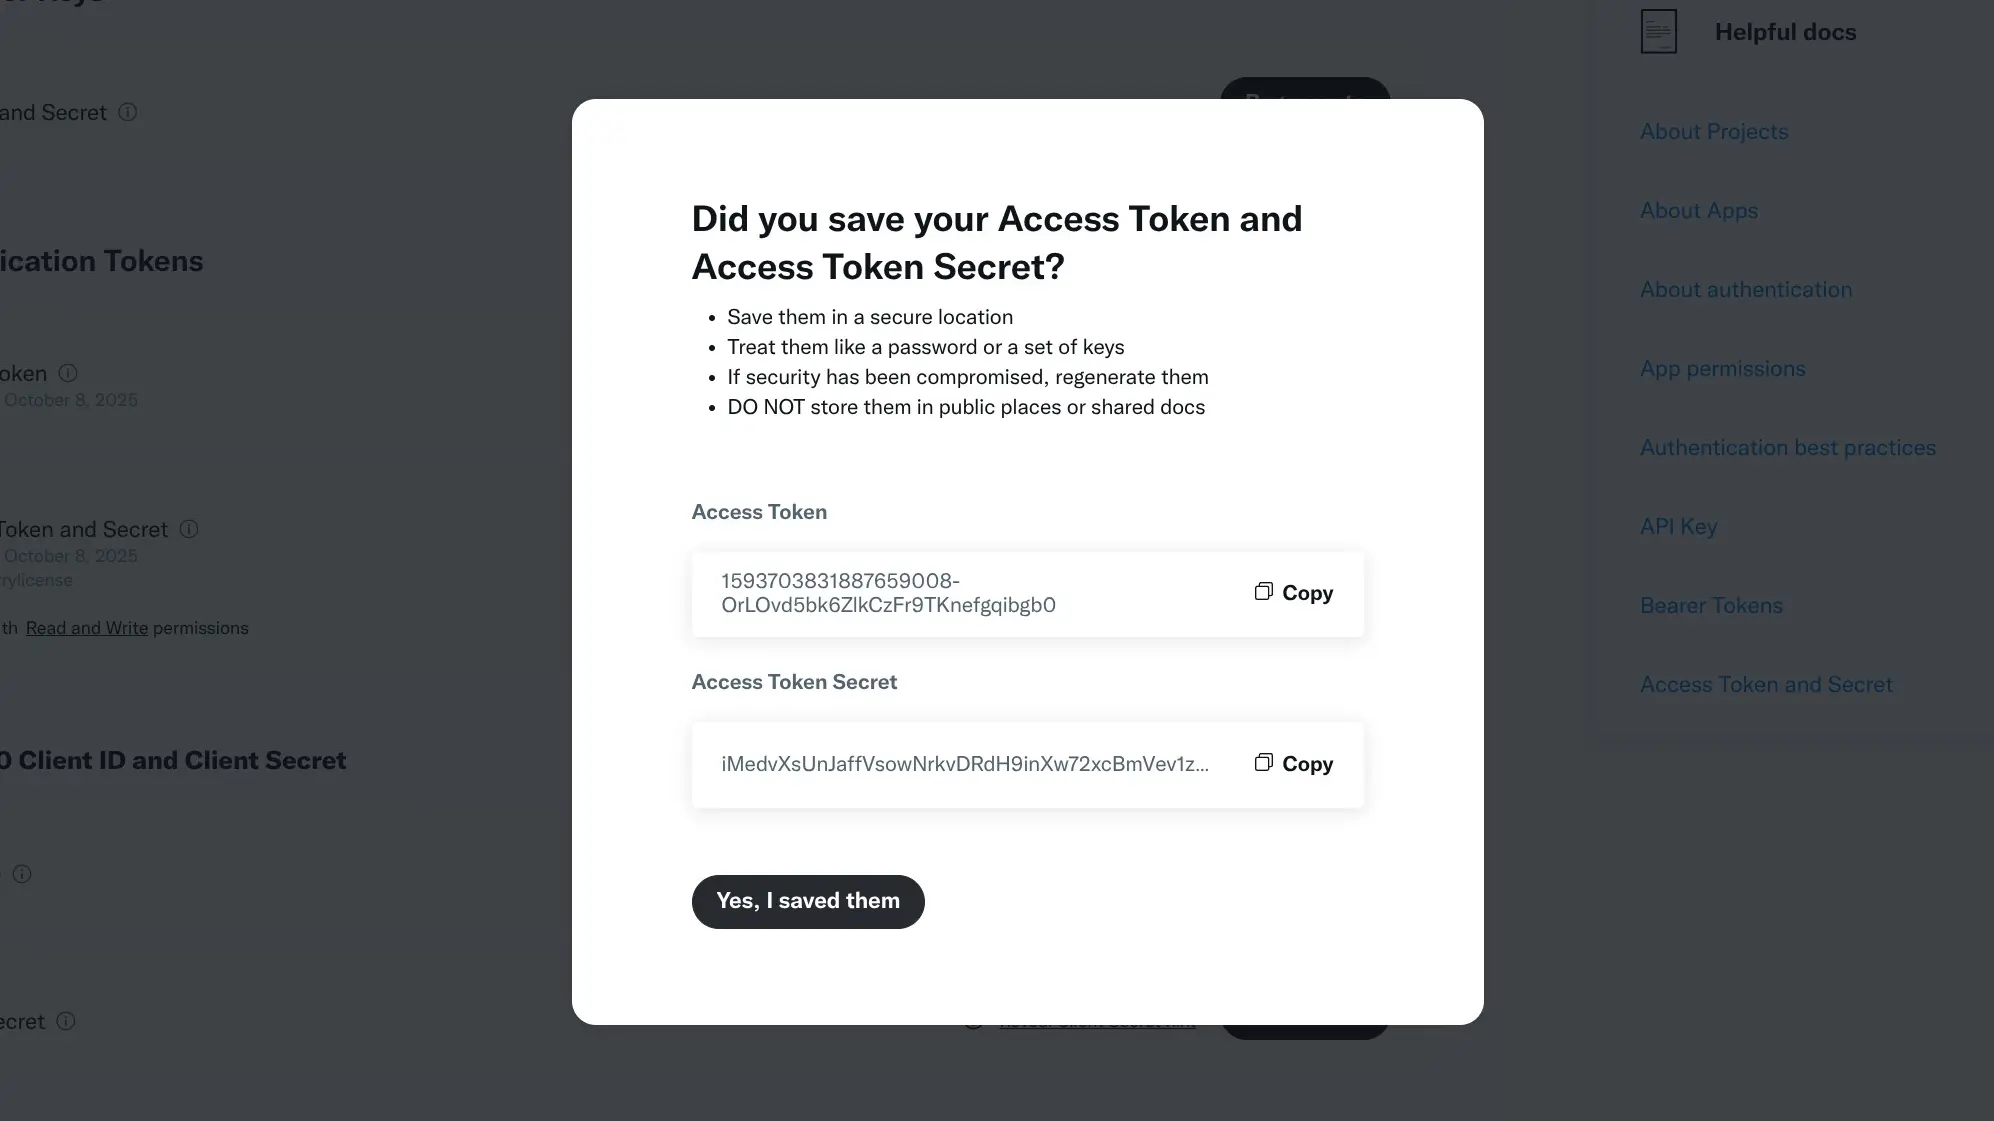
The Final Set of Keys
This is it! You're now presented with the Access Token and Secret. Copy them down into your document and we'll wrap this up after the screenshot!
You're Done!
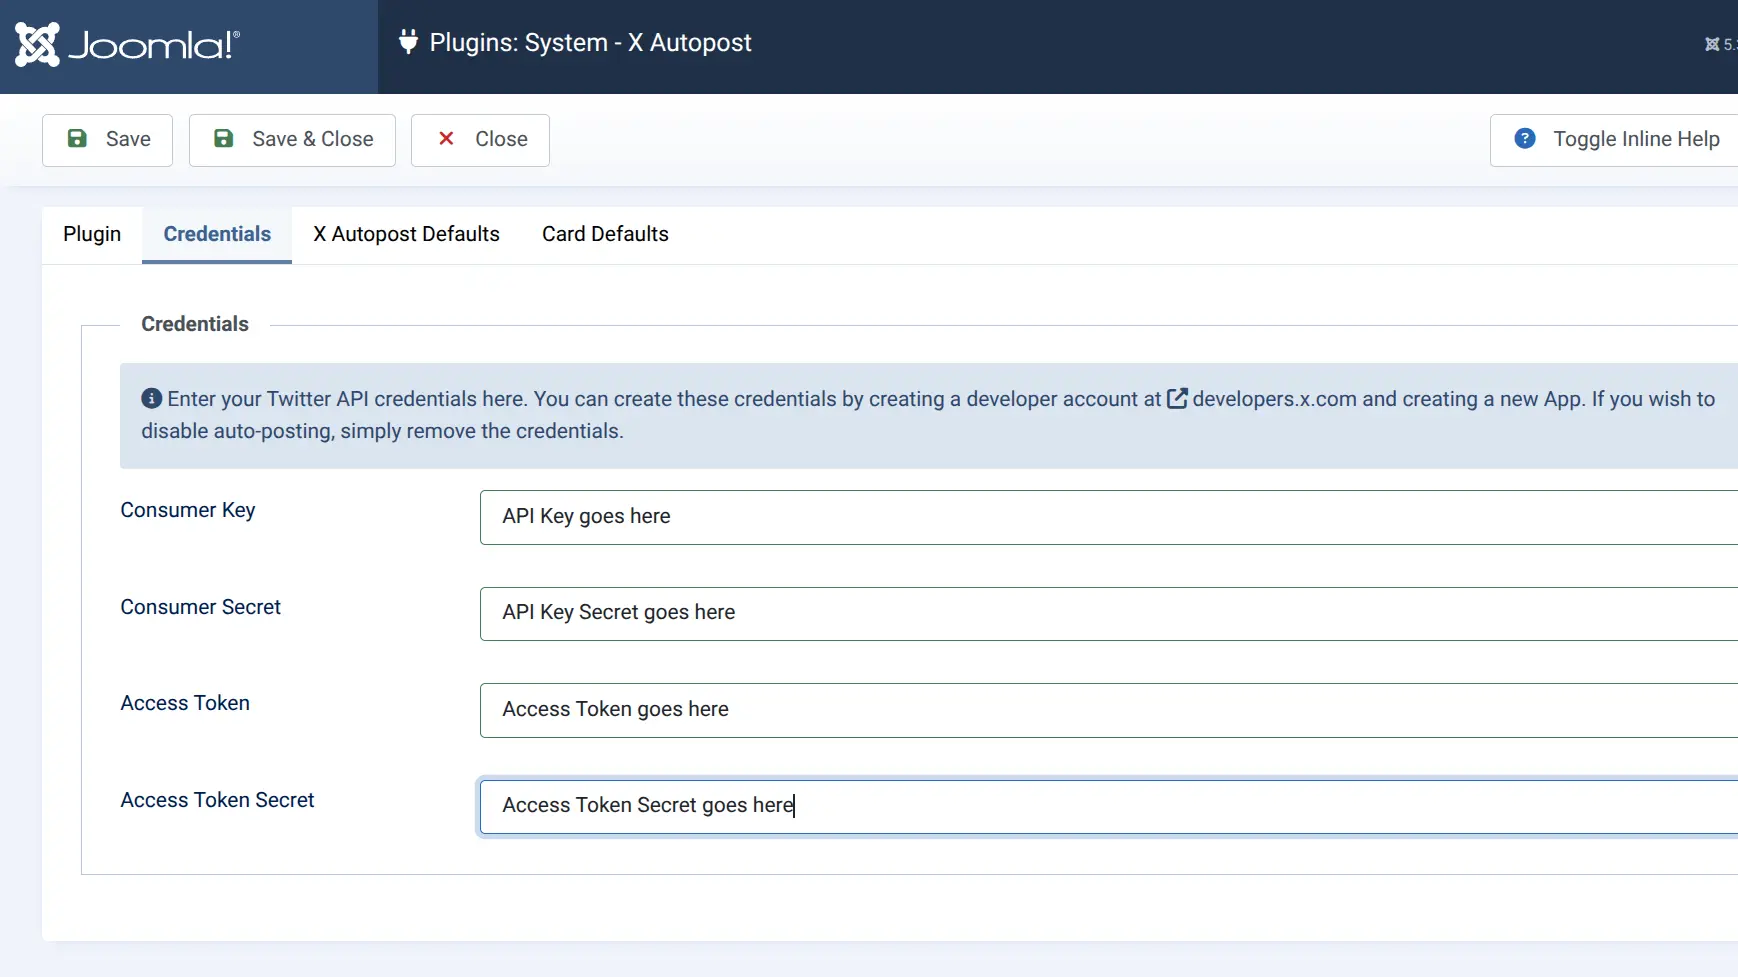
You have a list of keys, tokens, and secrets stored in a document - now I'll give you the details you need for X Autopost.
I have named the configuration fields to match what X calls them, but there's a problem - X calls them different names in different places. So, here's which key, token, or secret goes in which field of the plugin:
- Consumer Key = API Key
- Consumer Secret = API Key Secret
- Access Token = Access Token
- Access Token Secret = Access Token Secret